Use onCall and openCrmUrl
| Supported CRMs | Bullhorn, Microsoft Dynamics, Oracle NetSuite, Salesforce, ServiceNow, SugarCRM, Tier1 CRM, Zendesk
NOTE: Certain Advanced Workflow features are specific to certain CRMs where indicated.
|
| Supported PBX systems | All phone systems supported by Tenfold. Features may vary by system. For example, some phone systems support attached data while others do not. |
Open a URL from the CRM for no-match call events
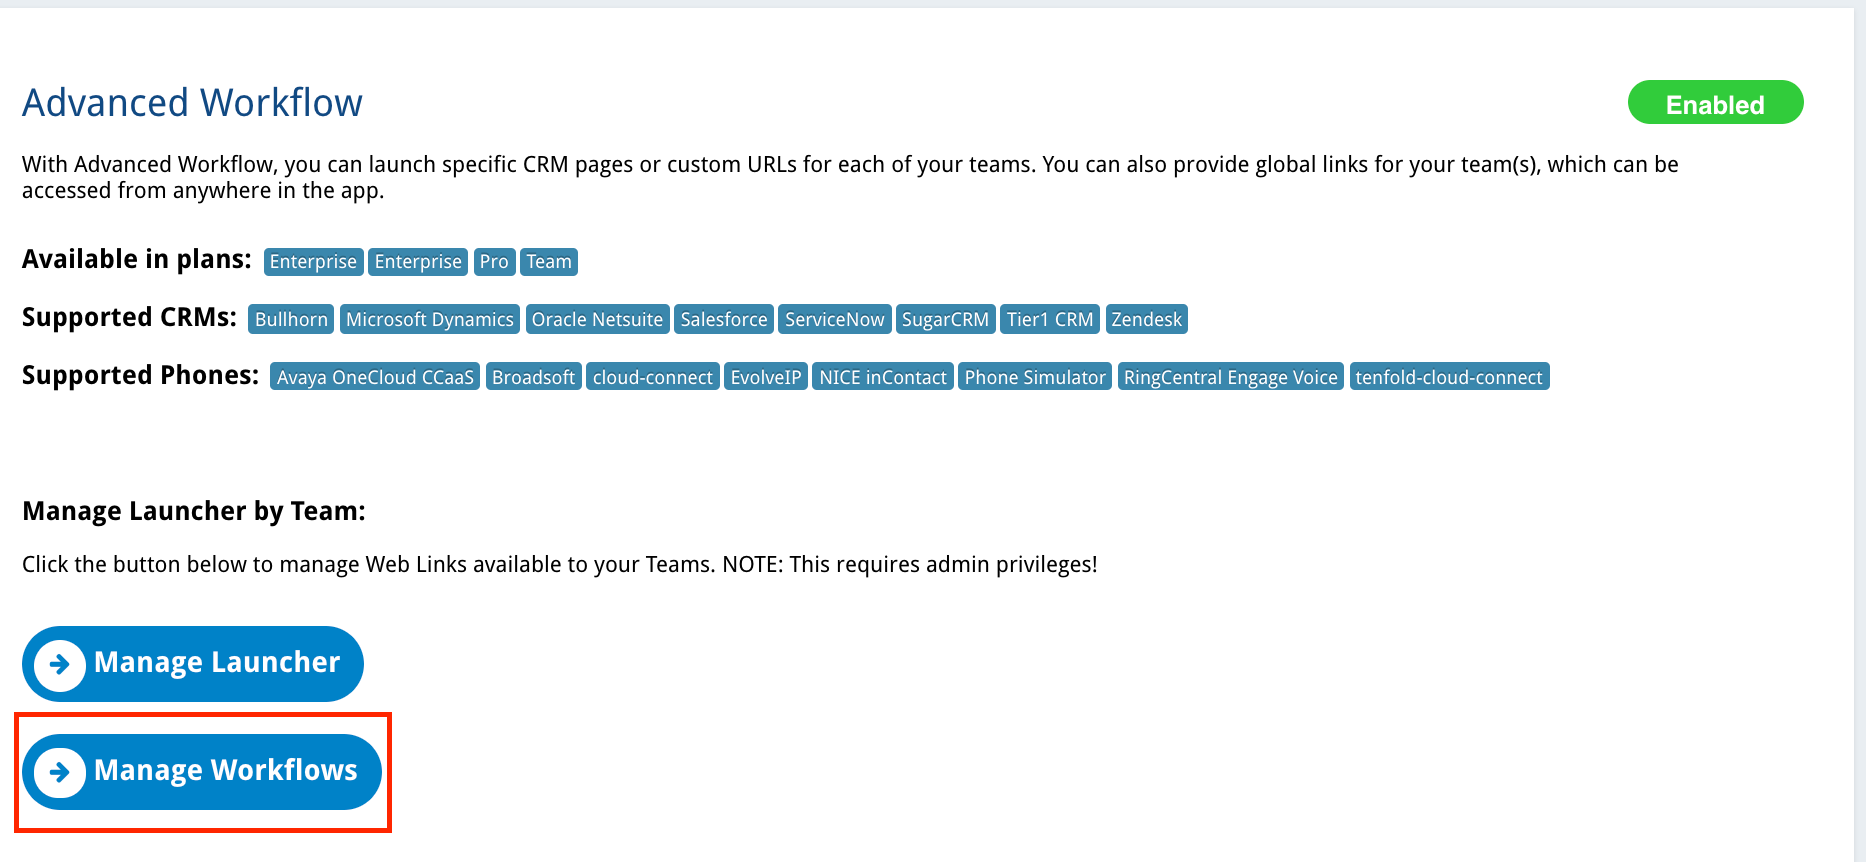
As a Tenfold administrator, you can configure the Tenfold UI to automatically open a specific URL in the CRM for no-match call events. Complete the following steps:
- Navigate to your Tenfold Dashboard.
- Click the Features tab.
- Click Advanced Workflow in the Features menu on the left-hand side of your screen.
- If Advanced Workflow is disabled, toggle the pill button in the top right corner to enable the feature.
- Click Manage Workflow.
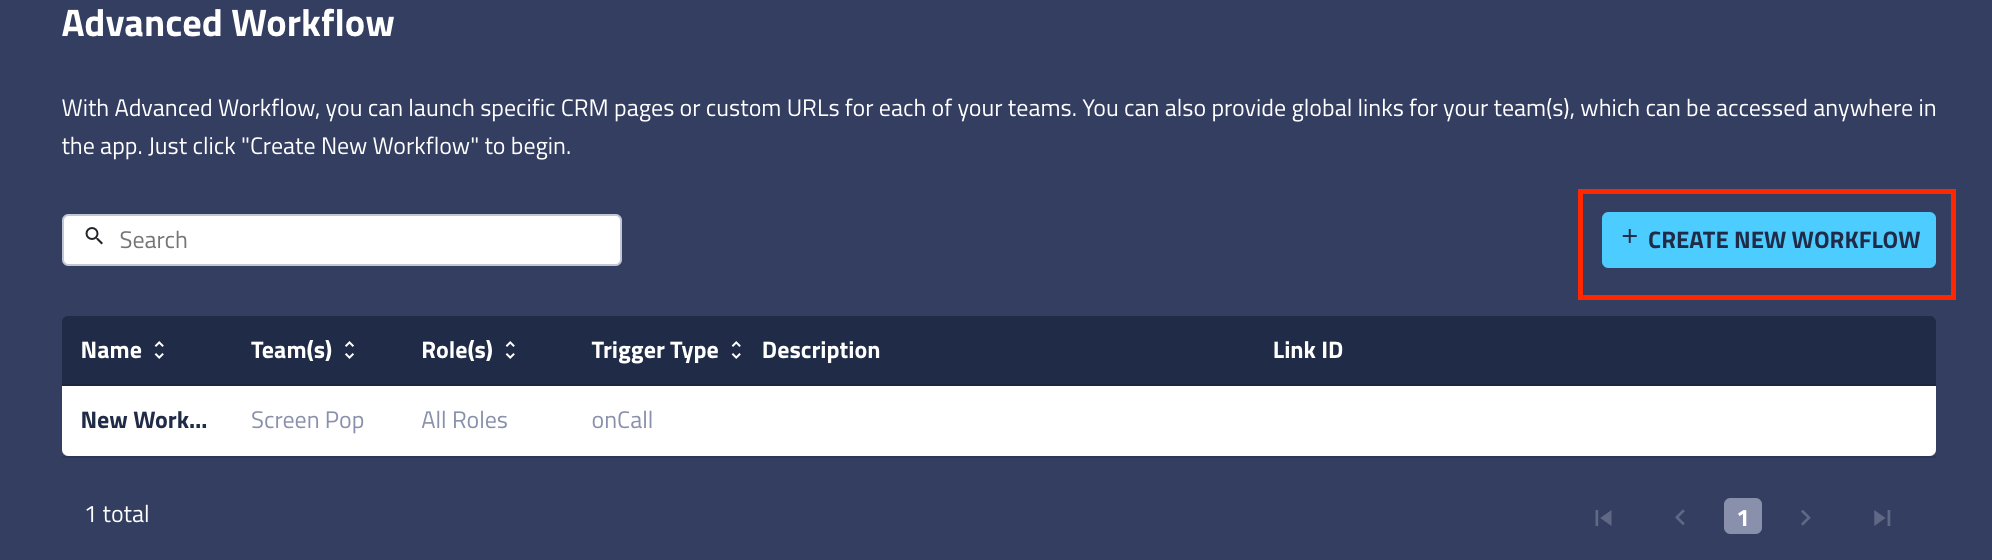
- Click + Create New Workflow.
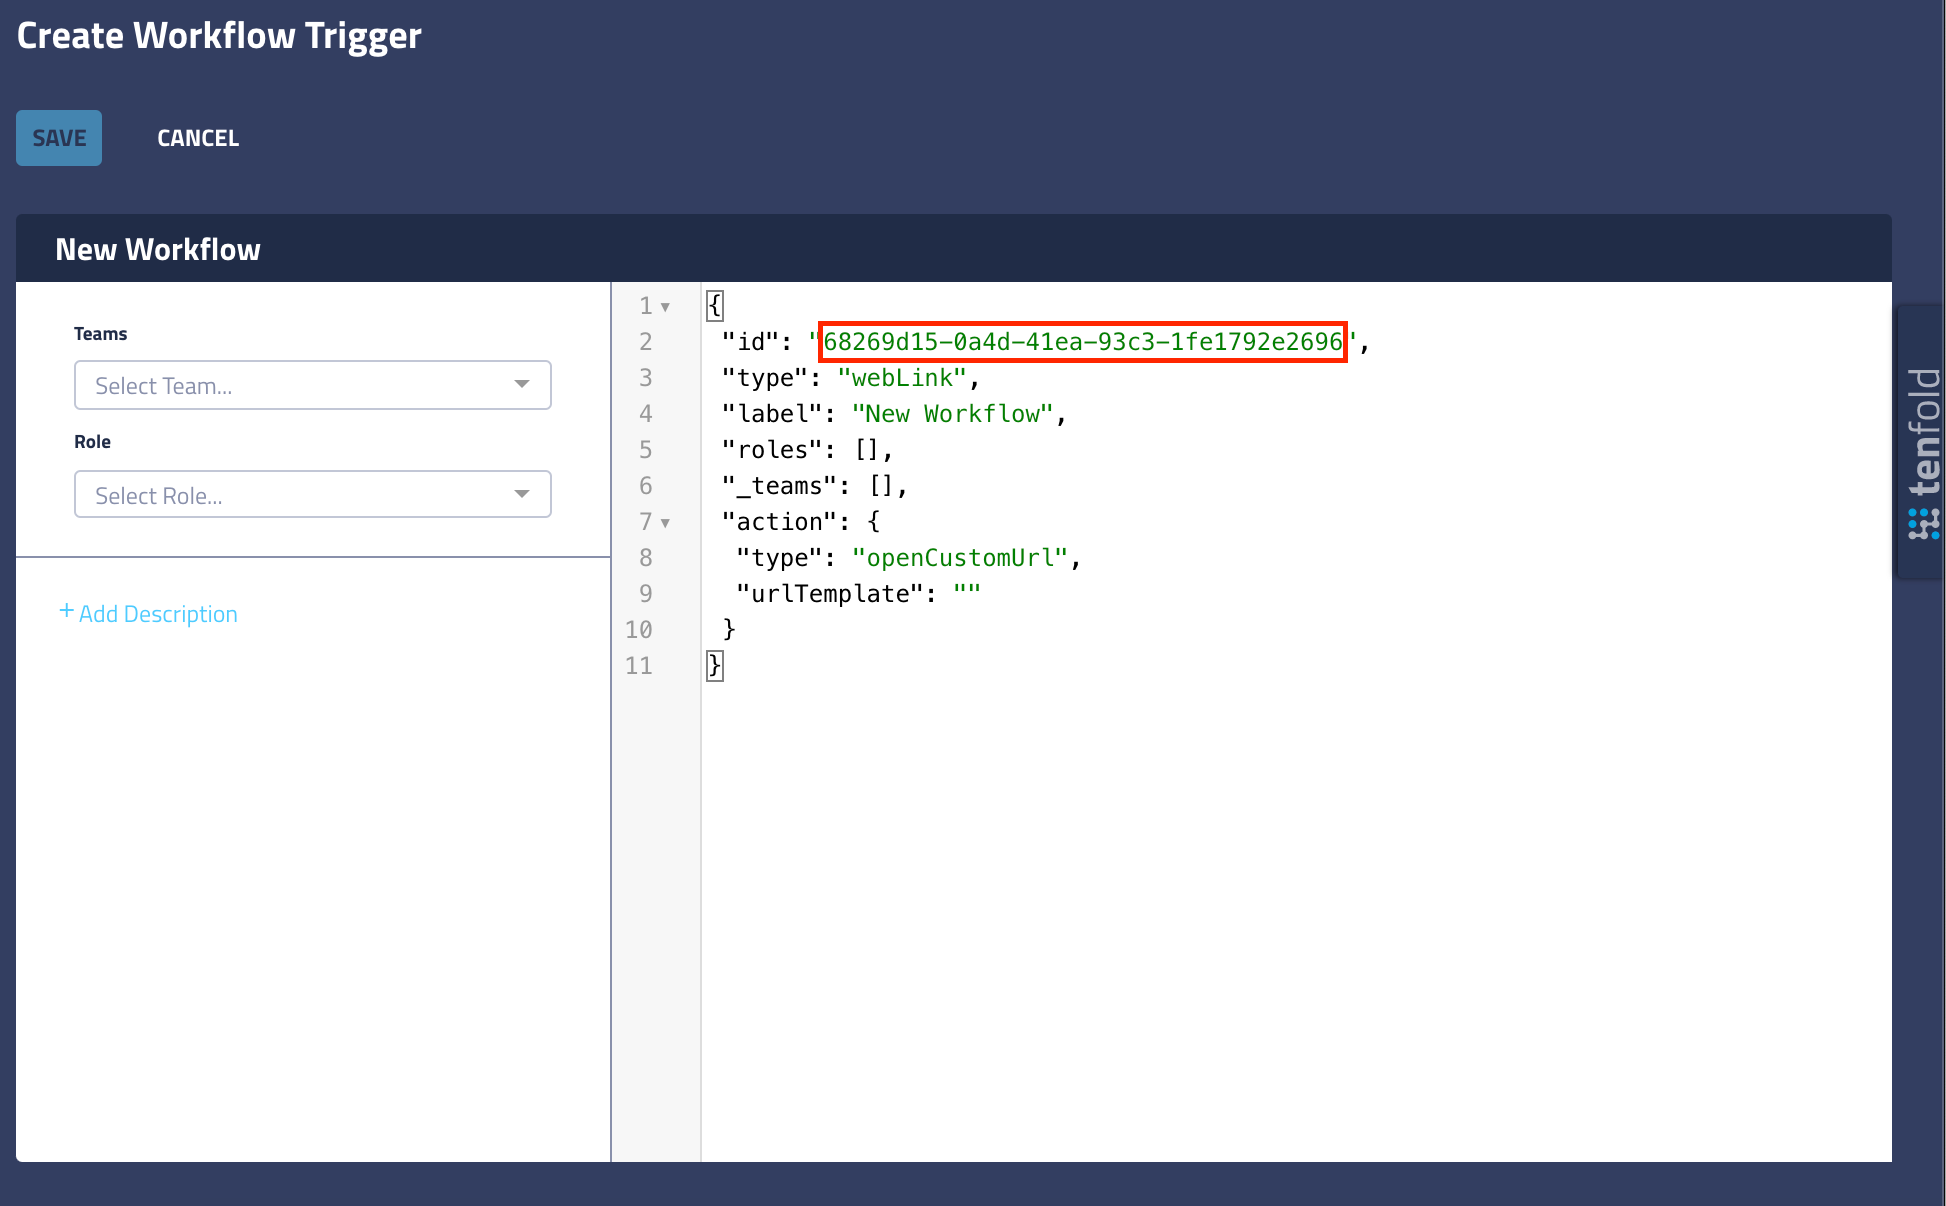
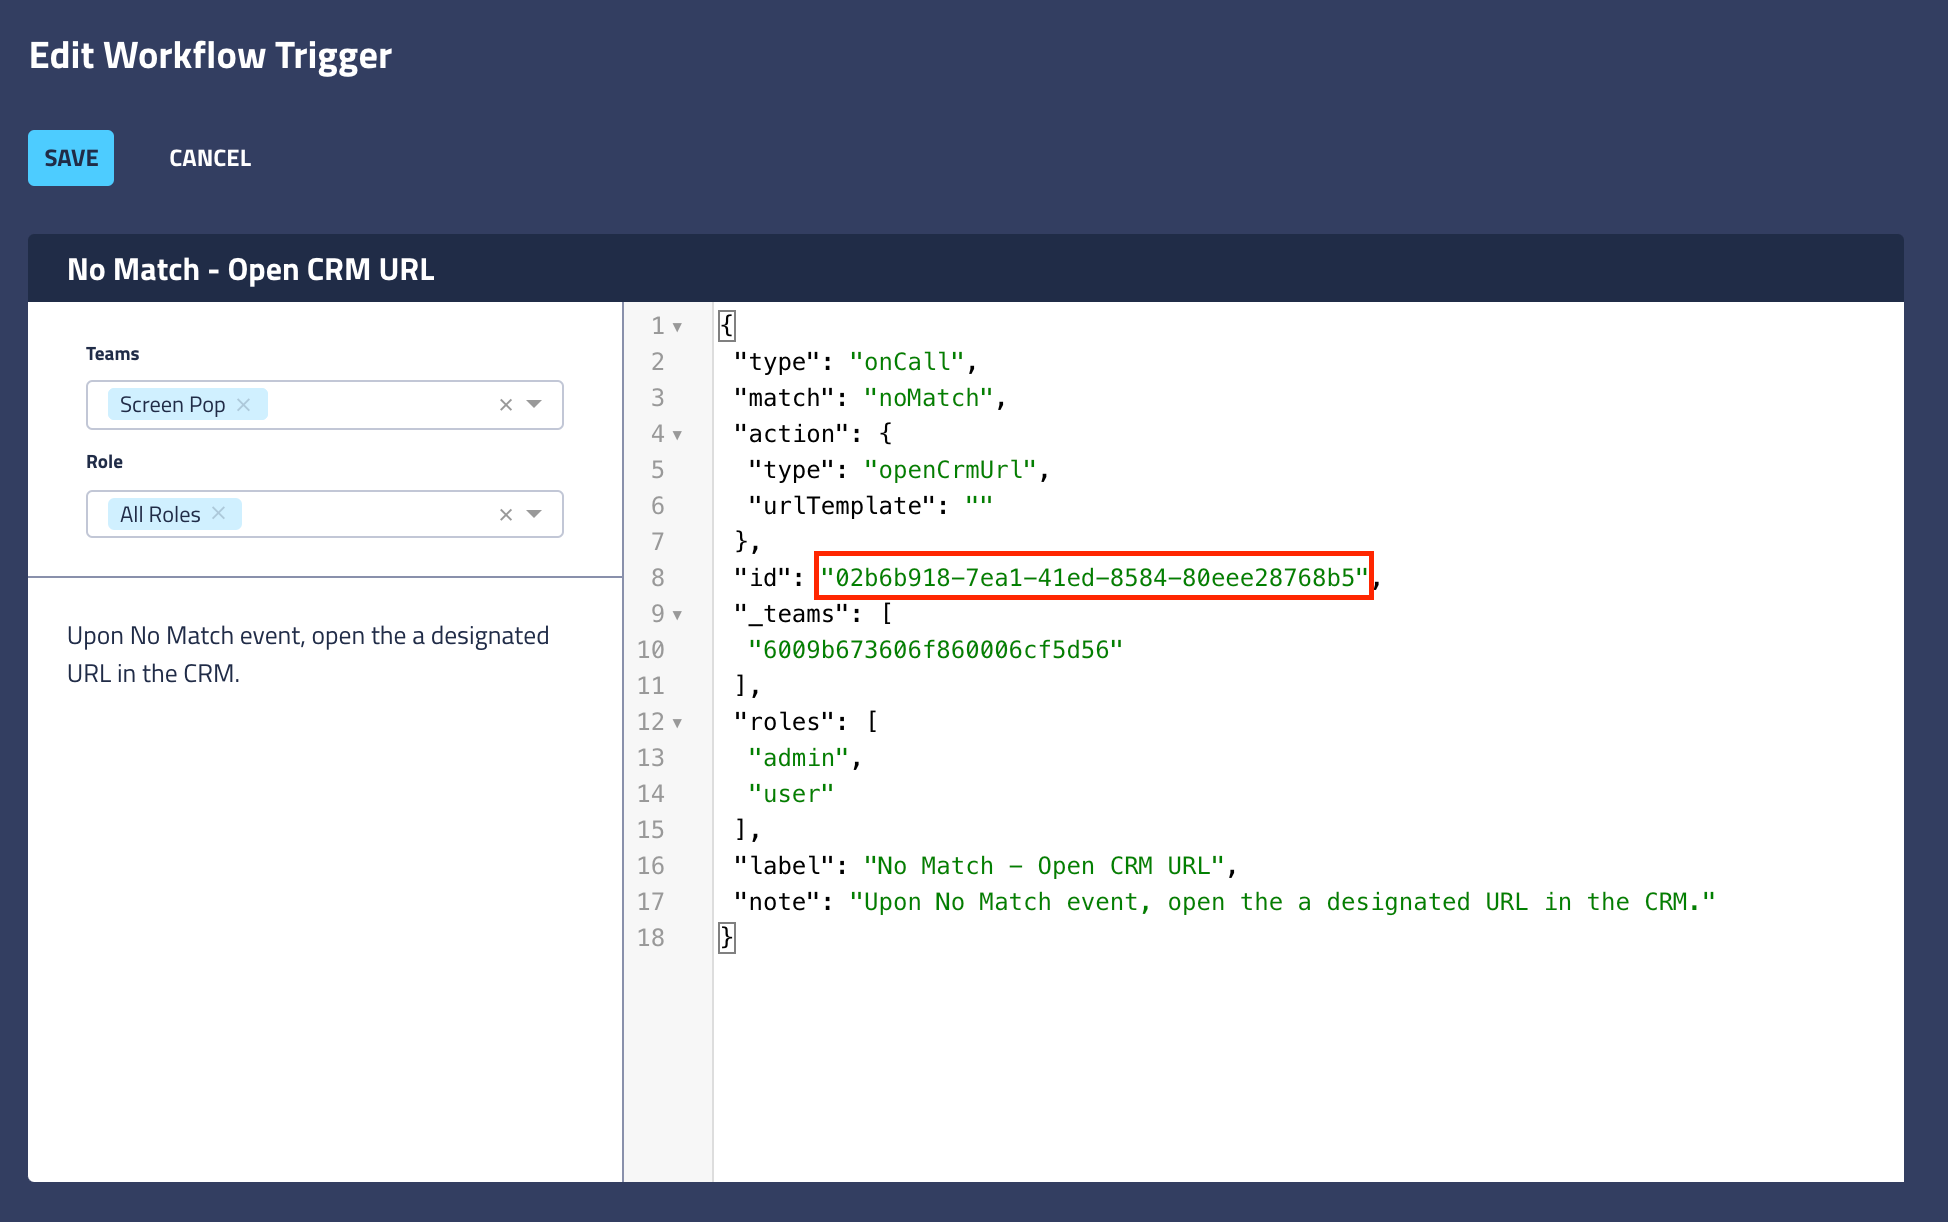
- Note that the configurator has automatically generated an ID, boxed in red in the image below.
- Copy this unique workflow ID for later use.
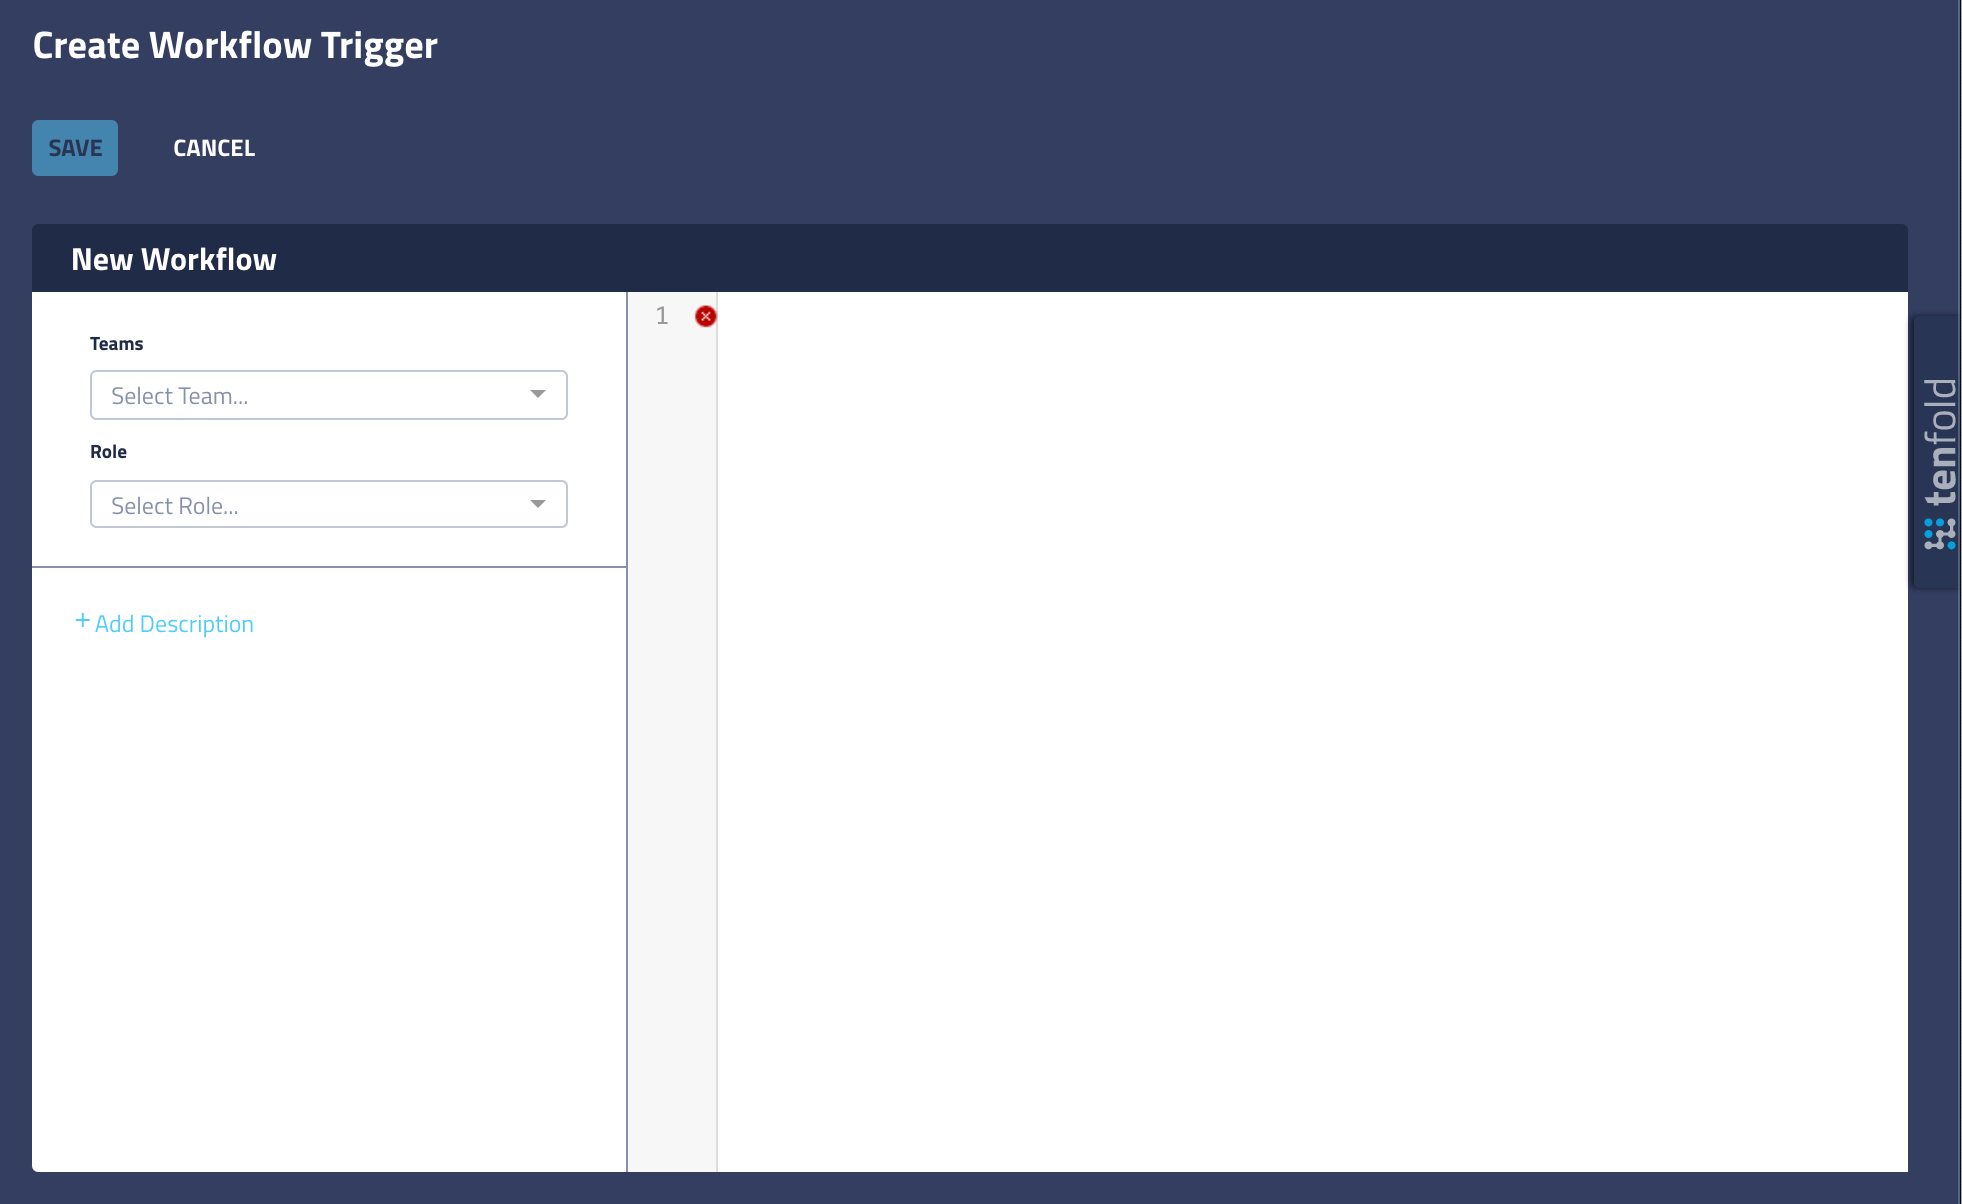
- Highlight and delete all prepopulated code. Your screen should now look like this:
- In place of the prepopulated code, paste the following:
javascript:
{
   "type":"onCall",
   "match":"noMatch",
   "action":{
      "type":"openCrmUrl",
      "urlTemplate":"<your_CRM_URL>"
   },
   "id":"<your_workflow_id>",
   "_teams":[
      "<your_selected_teams>"
   ],
   "roles":[
      "<your_selected_roles>"
   ],
   "label":"No Match - Open CRM URL",
   "note":"Upon No Match event, open the a designated URL in the CRM."
}
- Replace <your_CRM_URL> with the relative path to the URL from your CRM to use in the workflow.
- In the left pane, select the teams and roles that will have access to this workflow.
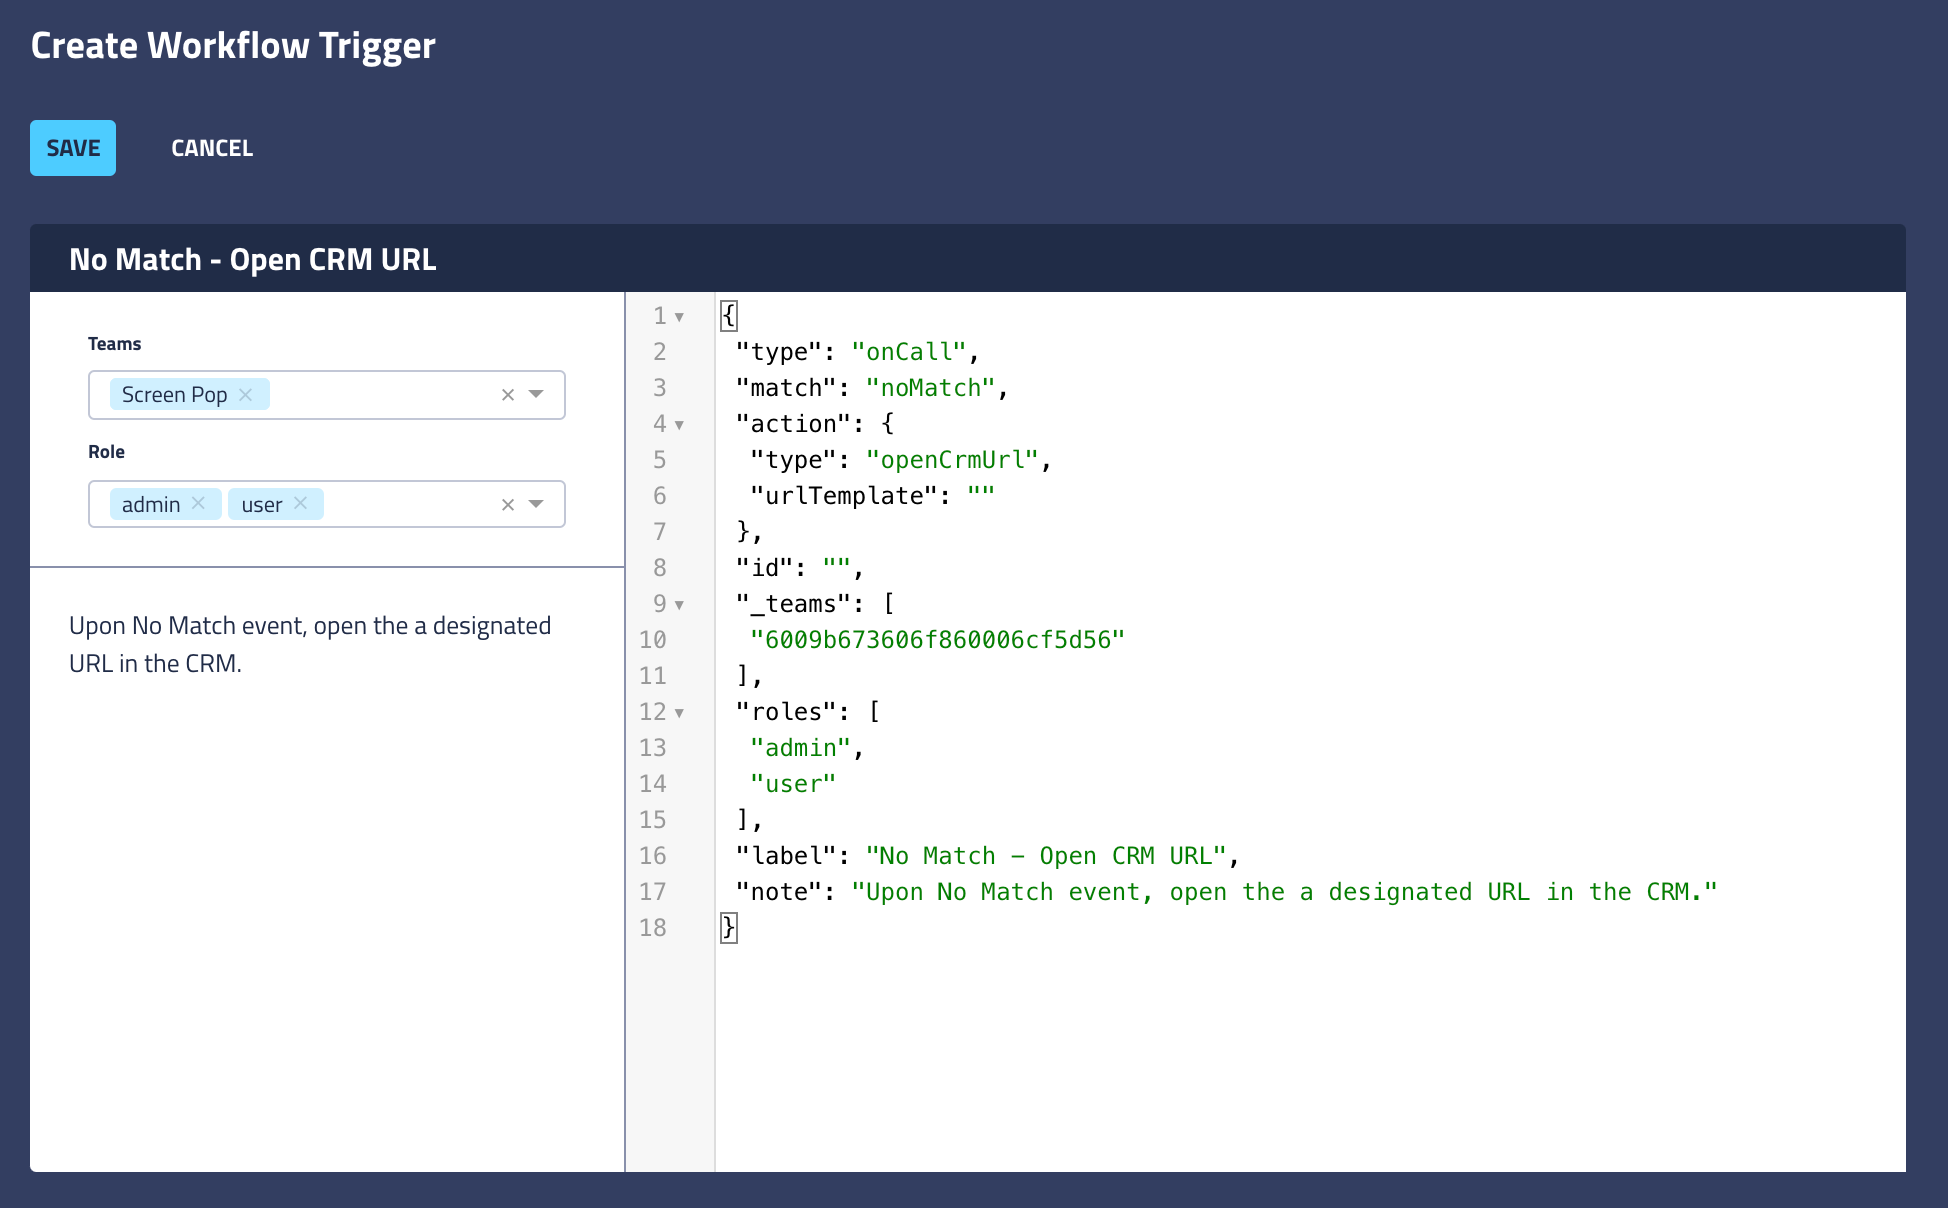
- Your configurator should now look similar to the following image:
- Paste the workflow ID that you previously saved into the indicated location:
- Click Save to publish your workflow.
- Generate an inbound or outbound no-match call to verify that your workflow trigger has been successfully implemented. NOTE: Click-to-Dial from the CRM will always generate a single match call. To perform a No Match outbound call, manually dial a phone number to initiate the call.