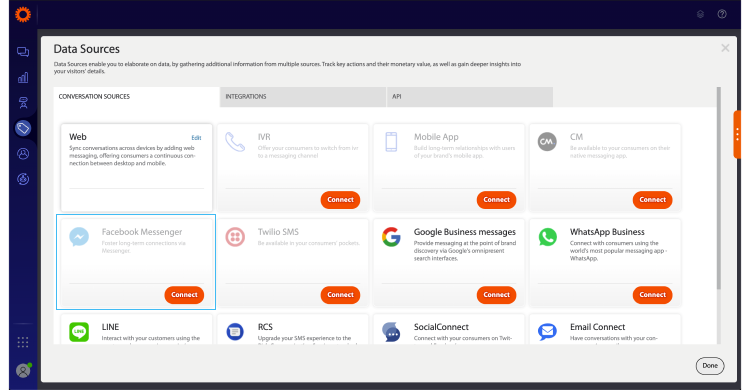
Connect Facebook Messenger to the Conversational Cloud.
Requirements:
- You must have a Facebook Page and admin rights to that page. If you don’t have one, click here.
- Download the Facebook Messenger App: iOS / Android.
Step 1: Setup Facebook Messenger as a data source
Login to the Conversational Cloud and click on the Campaign Builder tab located in the left navigation bar. Click on Data Sources in the Campaign Builder footnote.

Click Connect in the Facebook Messenger tile.

Enable the Source activation toggle, then click Next.

Step 2: Connect your Facebook page to the Conversational Cloud
Click the Facebook Log in button and log in to Facebook. If you are already logged in, a window will pop-up asking if you would like to "Continue as <your name>"? Click to proceed.
- A window will ask you "What Pages do you want to use with LP on Messenger (VA1)?". Select the page(s) you'd like to use Facebook integration on and click Next.
- You will then be prompted with the question: "What is LP on Messenger (VA1) allowed to do?" Leave the toggles as is and click Done.
- You will receive the confirmation message: "You’ve now linked LP on Messenger (VA1) to Facebook". Click on OK to close this window.
- A small pop-up within the Conversational Cloud will appear asking you to Subscribe. Subscribe the relevant Facebook pages (the same ones you gave permissions to earlier) and click on Done.
- Click on Done on the lower right corner.
Tip: You do not need to add an Agent Manager to get started.

Step 3: Send and receive messages from Facebook Messenger
You can now test the setup by sending a message from Facebook Messenger App to your Facebook page. When the message shows up in the Agent Workspace, you can respond as an agent and see the response in your Facebook Messenger App.