Overview: If your Polycom phone has software version above 5.0 you will need to go through the following steps to ensure click to dial will function as expected
- Update the Web Configuration on your Polycom phone by navigating to: Settings > Advanced > Administration Settings > Web Server Configuration and then change Web Config Mode to HTTP/HTTPS.
- Download the necessary certificates from the Polycom website. You will need these certificates:
- Polycom Root CA
- Polycom Equipment Policy CA
- Polycom Equipment Issuing CA 2 The certificates will need to be installed and trusted by your computer.
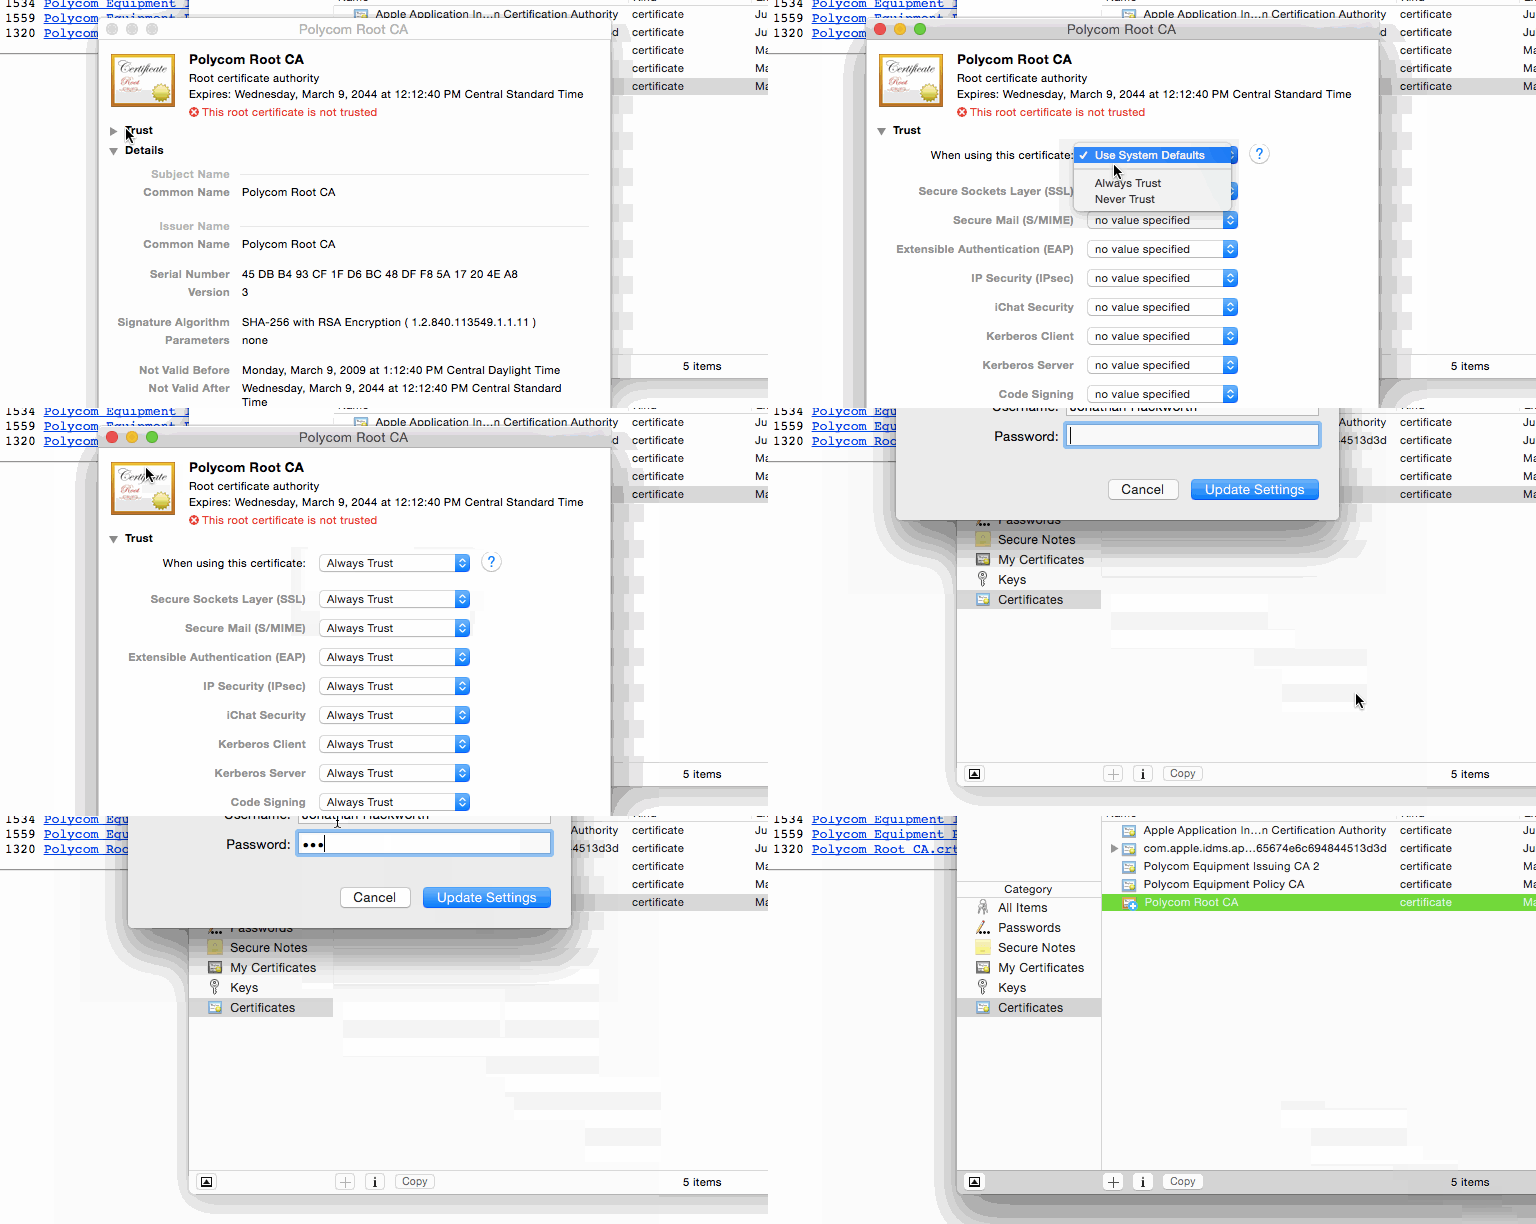
- Install the certificates. On Mac OSX:
- Double-click the downloaded
.crt file. Keychain Access will open.
- Double-click the certificate name in Keychain Access. Change the “When using this certificate field” to Always Trust.
- Close the window. You will have to type in your password to confirm.
- Repeat for each certificate.

On Windows:
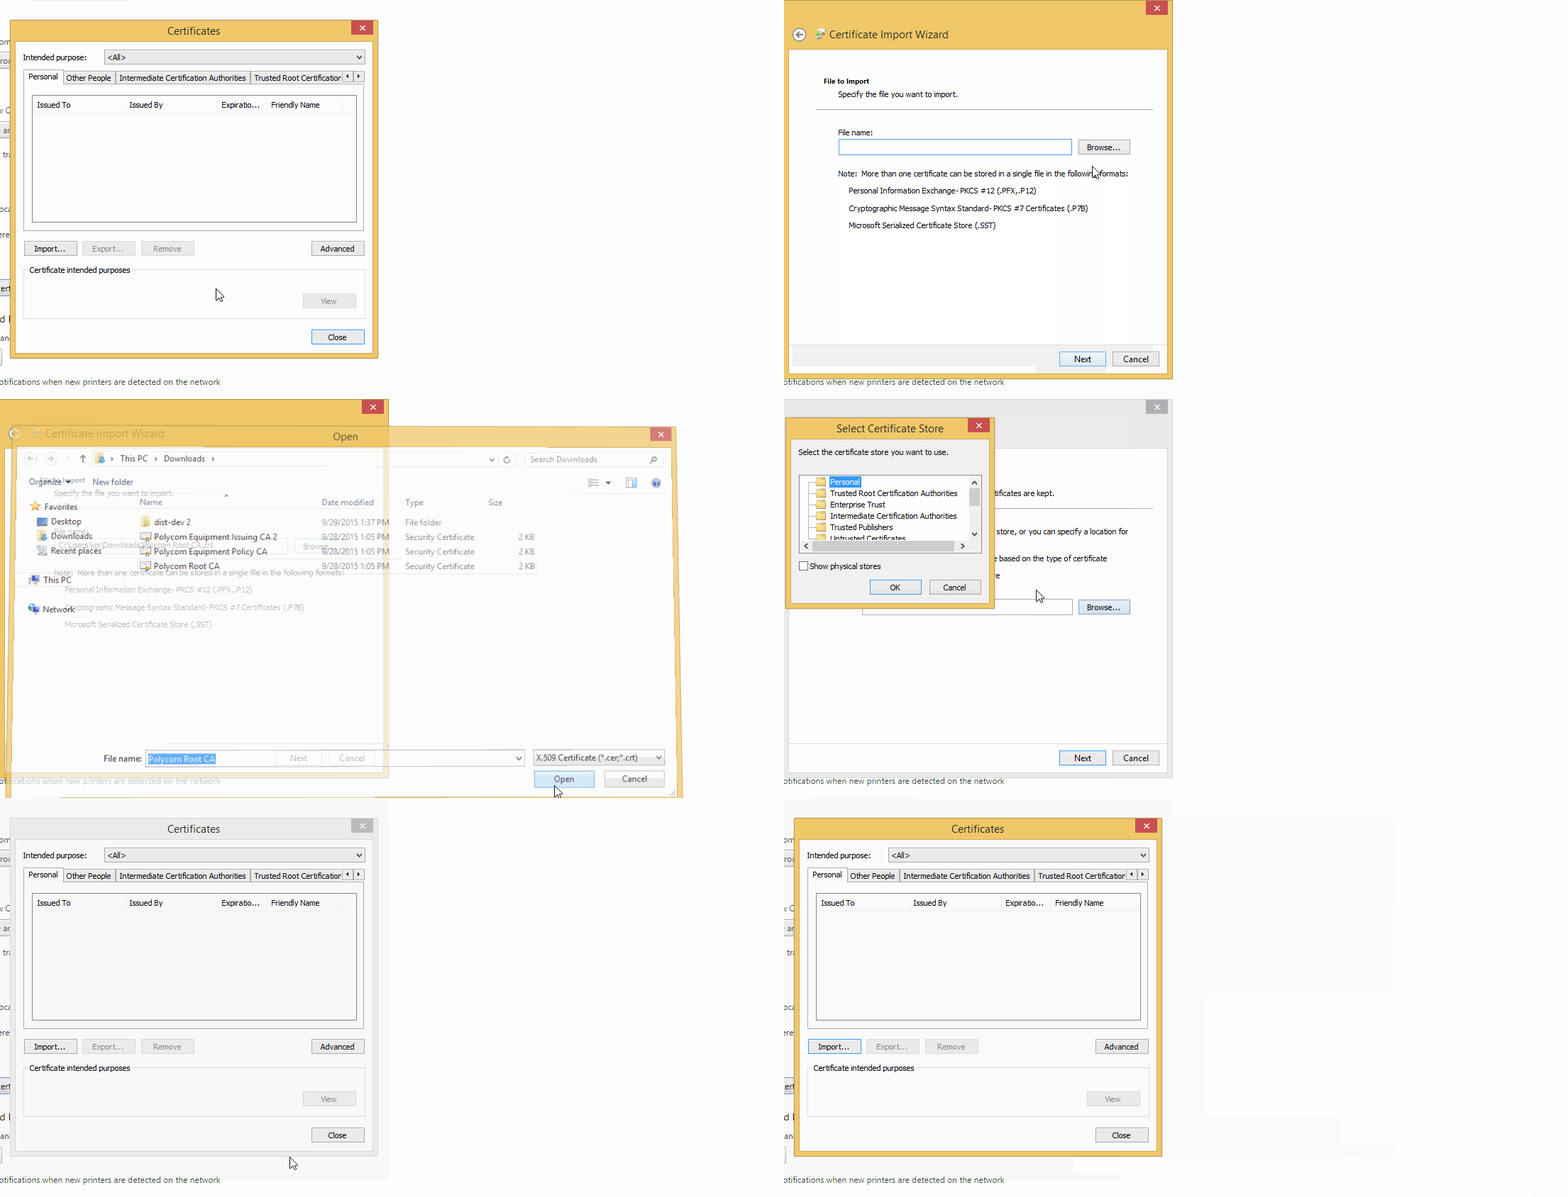
- Open the Google Chrome settings by going to chrome://settings
- Scroll to the bottom of the page and click “Show Advanced Settings”
- Under HTTPS/SSL click Manage Certificates
- In the Windows that opens, click Import to open the Certificate Import Wizard and click next.
- Click Browse and locate the “Polycom Root CA” and click next.
- Choose the option for “Place certificates in the following store” and click Browse
- Choose the “Trusted Root Certification Authorities” folder. Click Next and then click Finish.
- Repeat steps d through g for the “Polycom Equipment Policy CA” and “Polycom Equipment Issuing CA 2” certificates. These should be placed in the “Intermediate Certificate Authorities” folder.

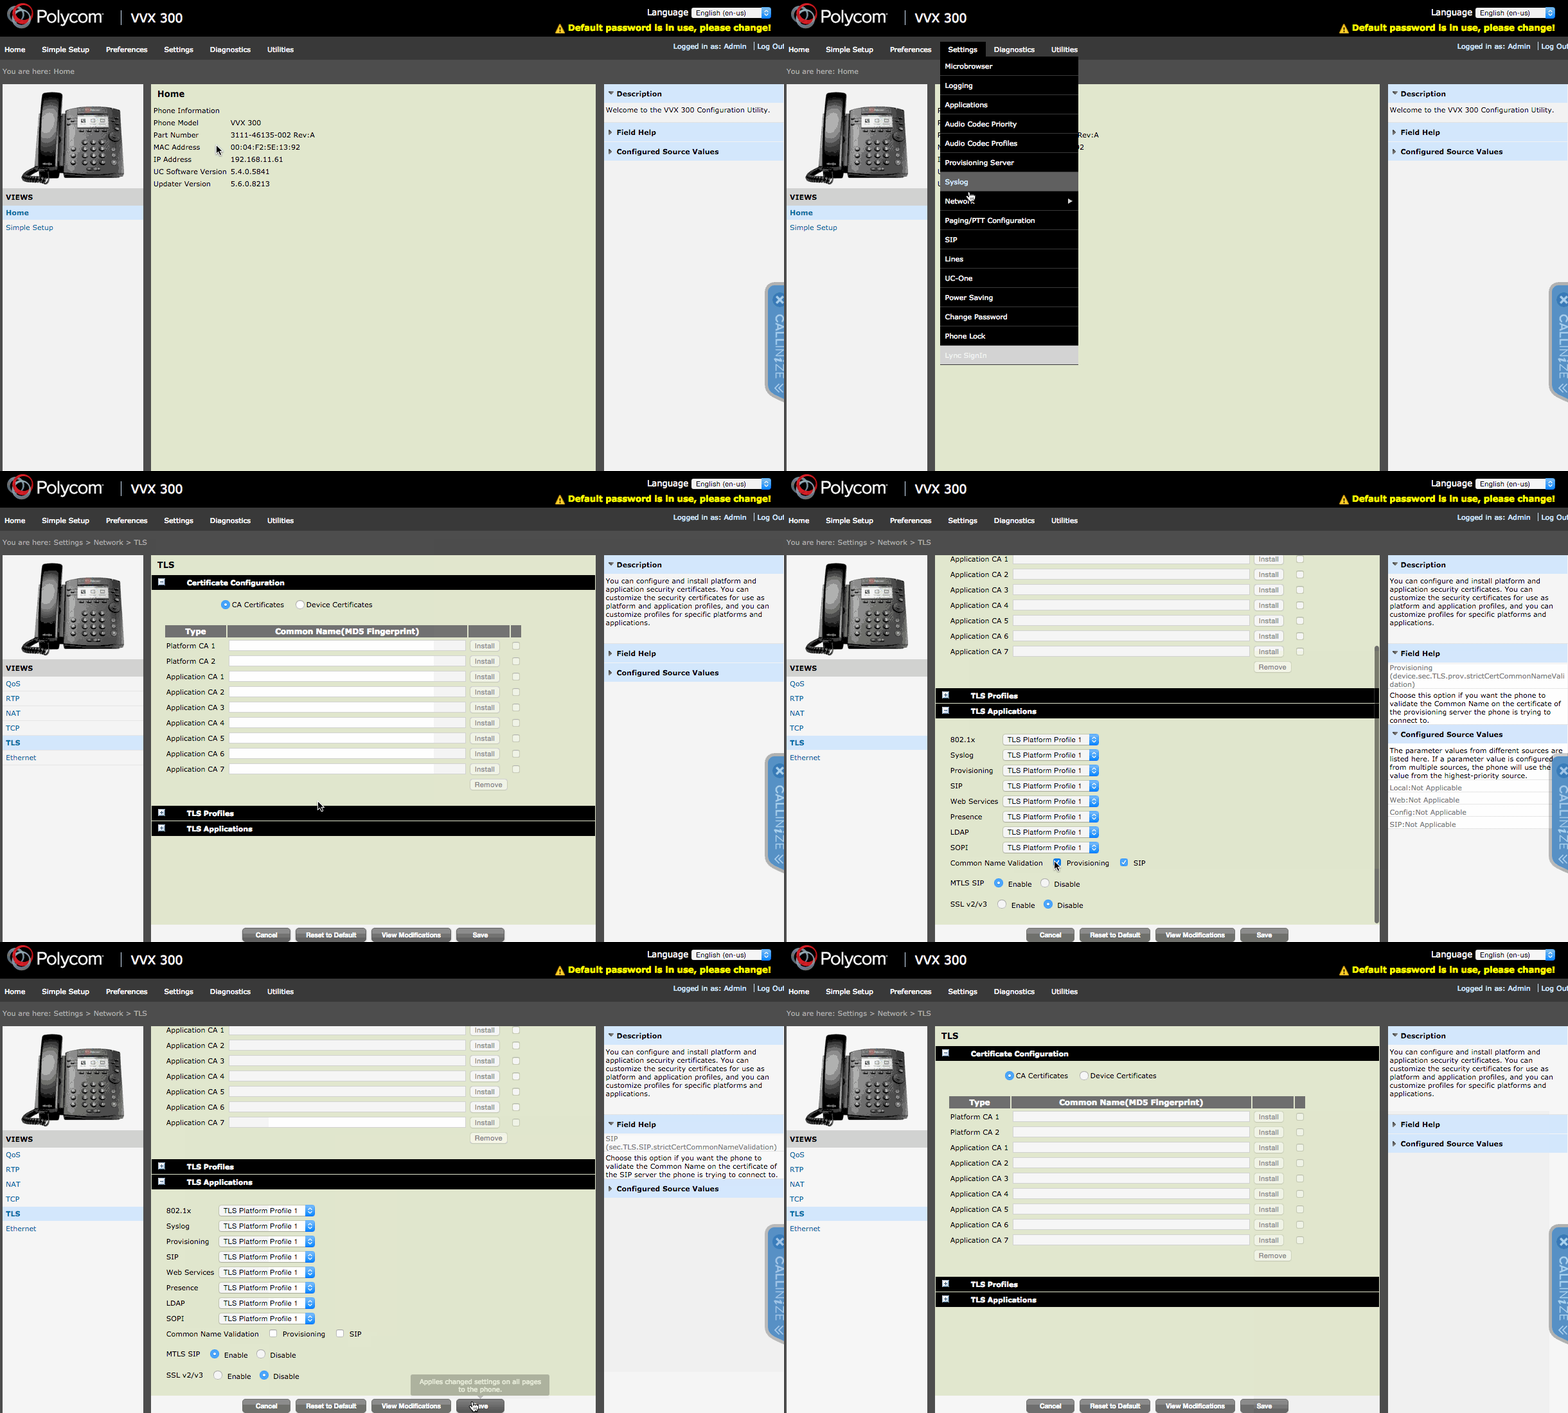
- Open the Polycom web interface by going to
https://IP_ADDRESS and navigate to
- Settings > Network > TLS > TLS Applications > Common Name Validation and remove the checks next to Provisioning and SIP.

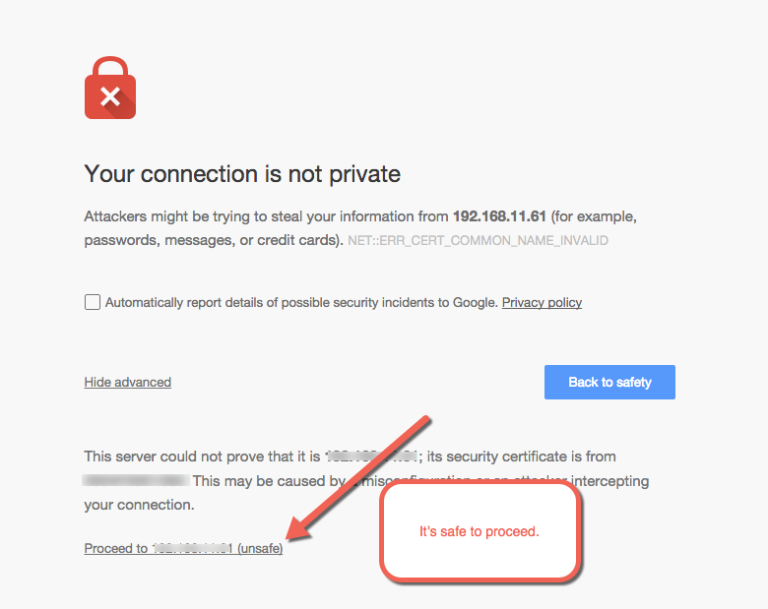
- Go to our Click to Dial Test Page and test click to dial! If we are unable to communicate with your phone a new tab will be opened that points to your phone’s IP address. You will need to click Advanced > Proceed to IP_ADDRESS.

- Click to dial is now configured and ready for you to test.