Adding New Custom Predefined Content
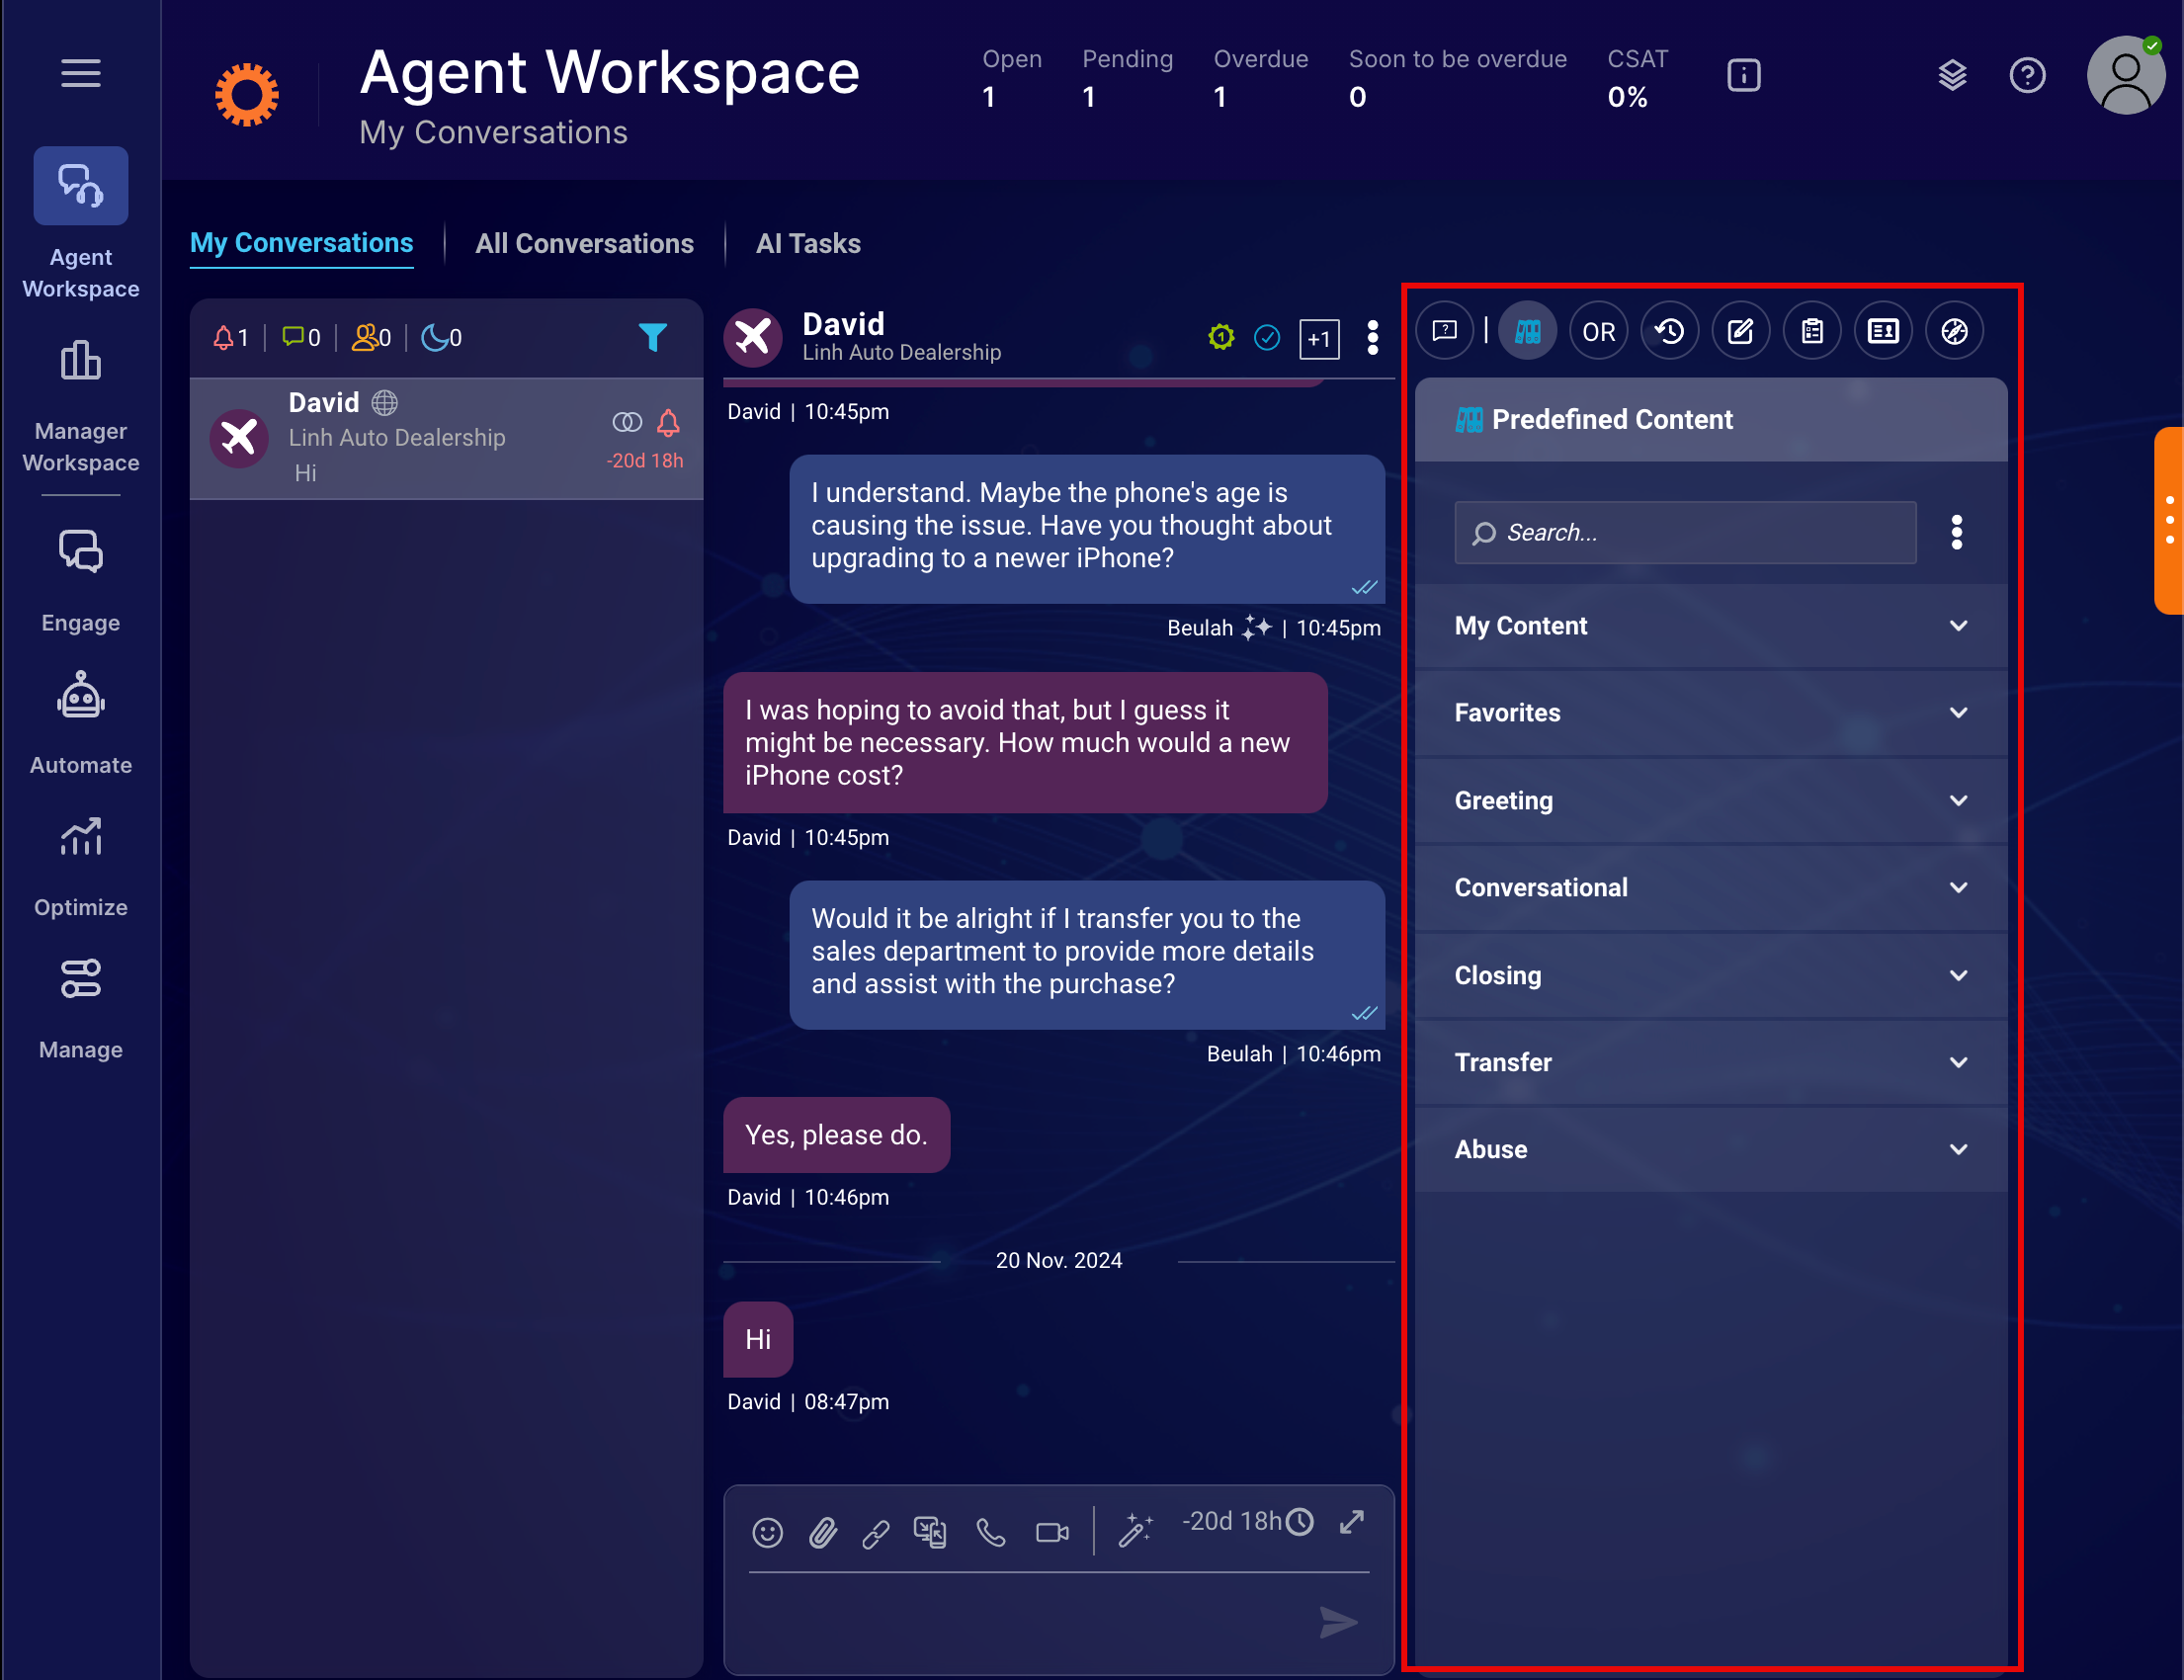
1. At the top of the Agent Workspace page, click the Predefined Content Widget icon. The Predefined Content section appears, displaying a list of predefined templates.
2. Click My Content > + Add New Content. The Add Content section appears.
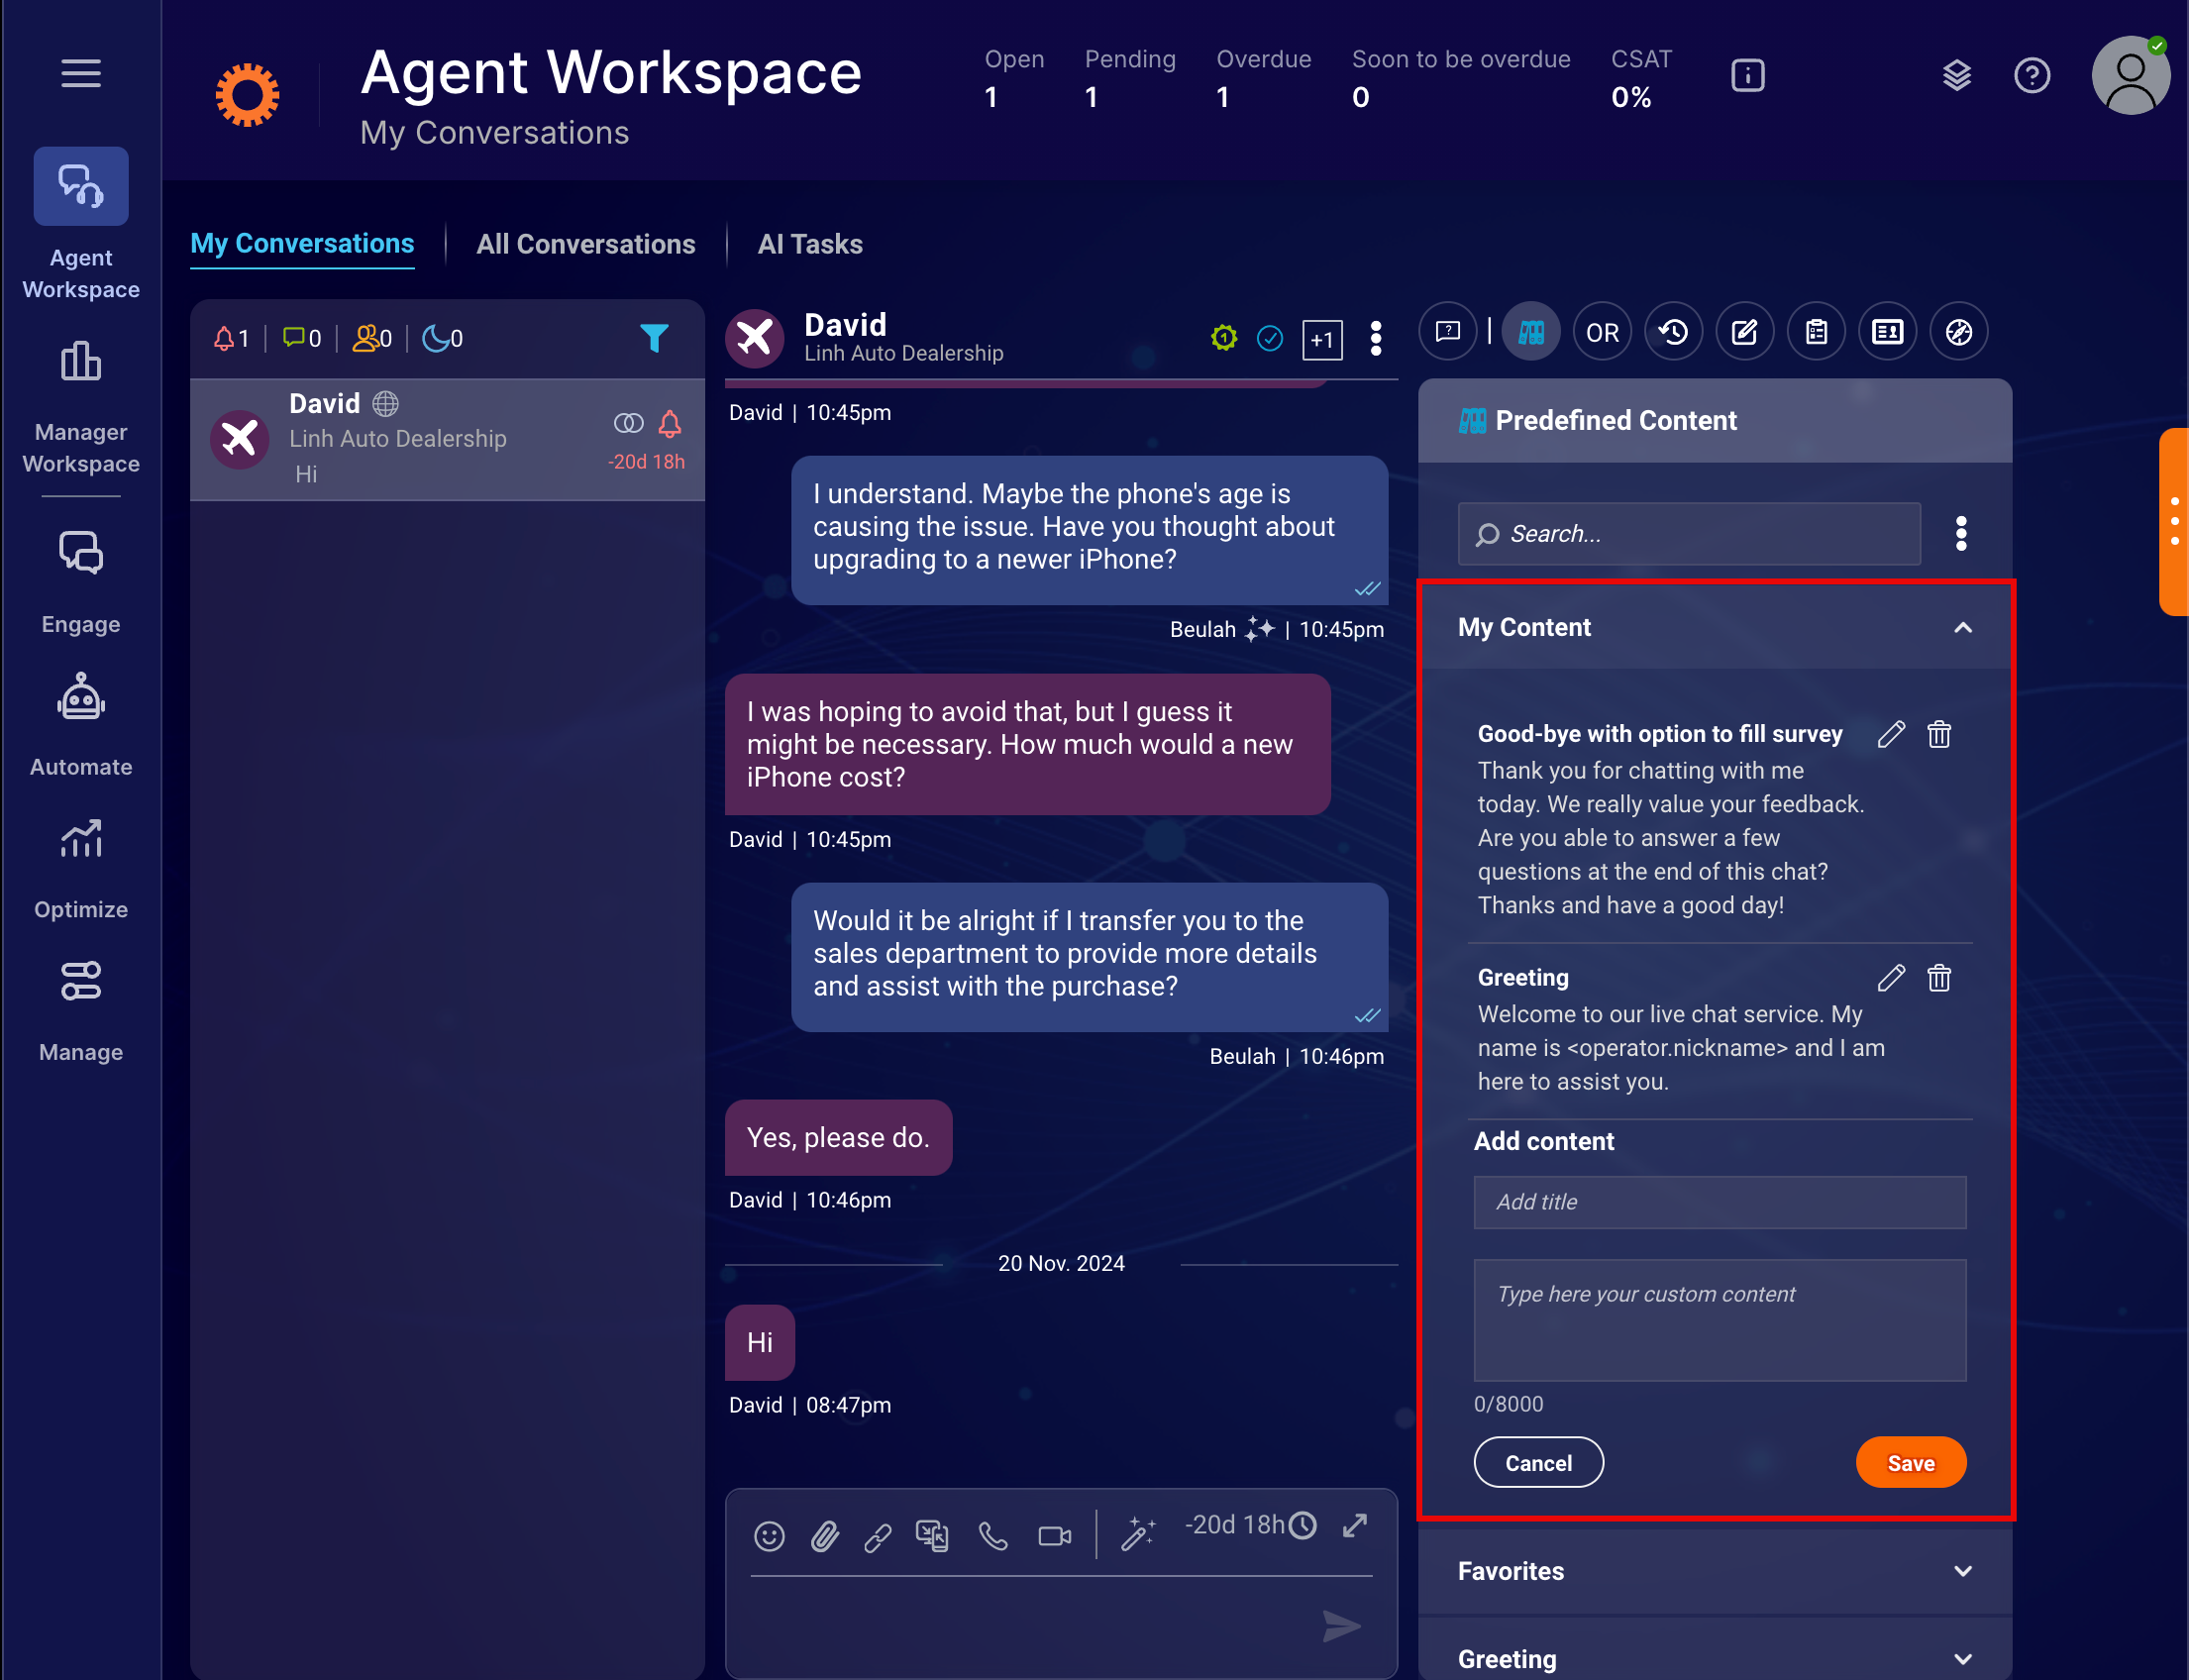
3. Enter the details in the Add Title and Type here your custom content fields, then click Save. The new predefined content is added to the list under My Content.
Editing Existing Custom Predefined Content
1. At the top of the Agent Workspace page, click the Predefined Content icon. The Predefined Content section appears, displaying a list of predefined templates.
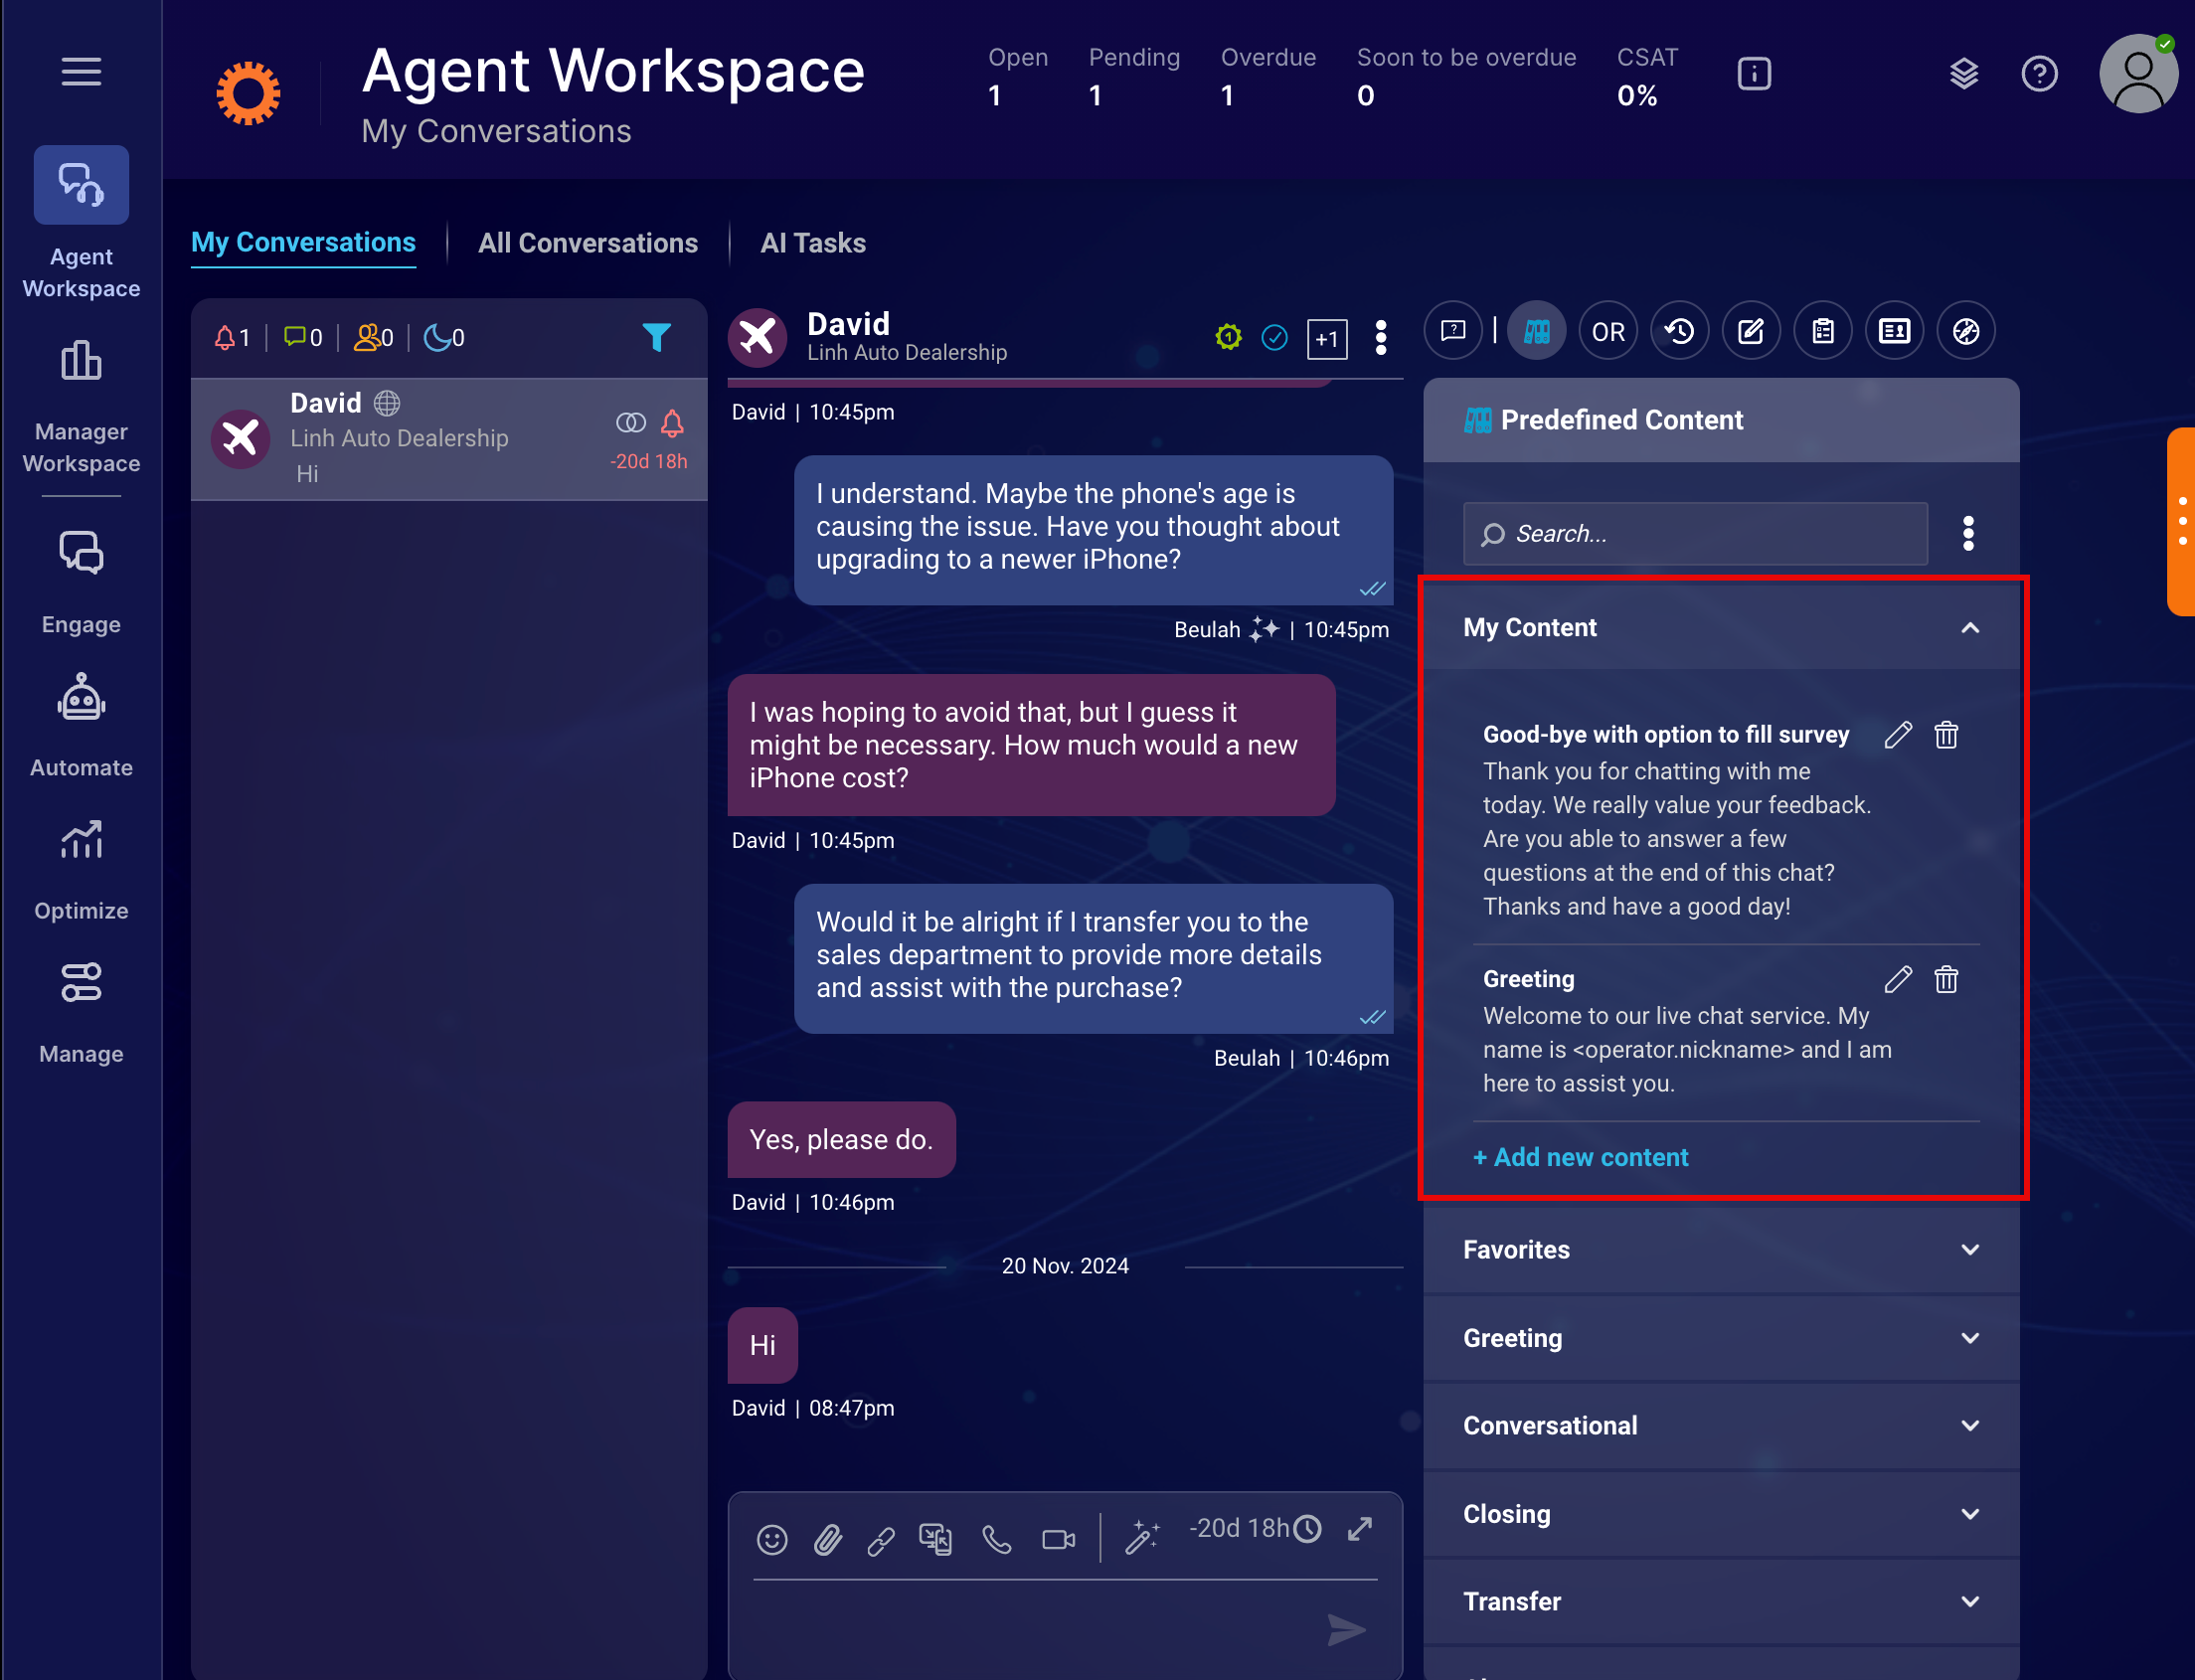
2. Click My Content to view the list of predefined templates.
3. Next to the desired predefined content, click the Edit icon. The Edit Content section appears.
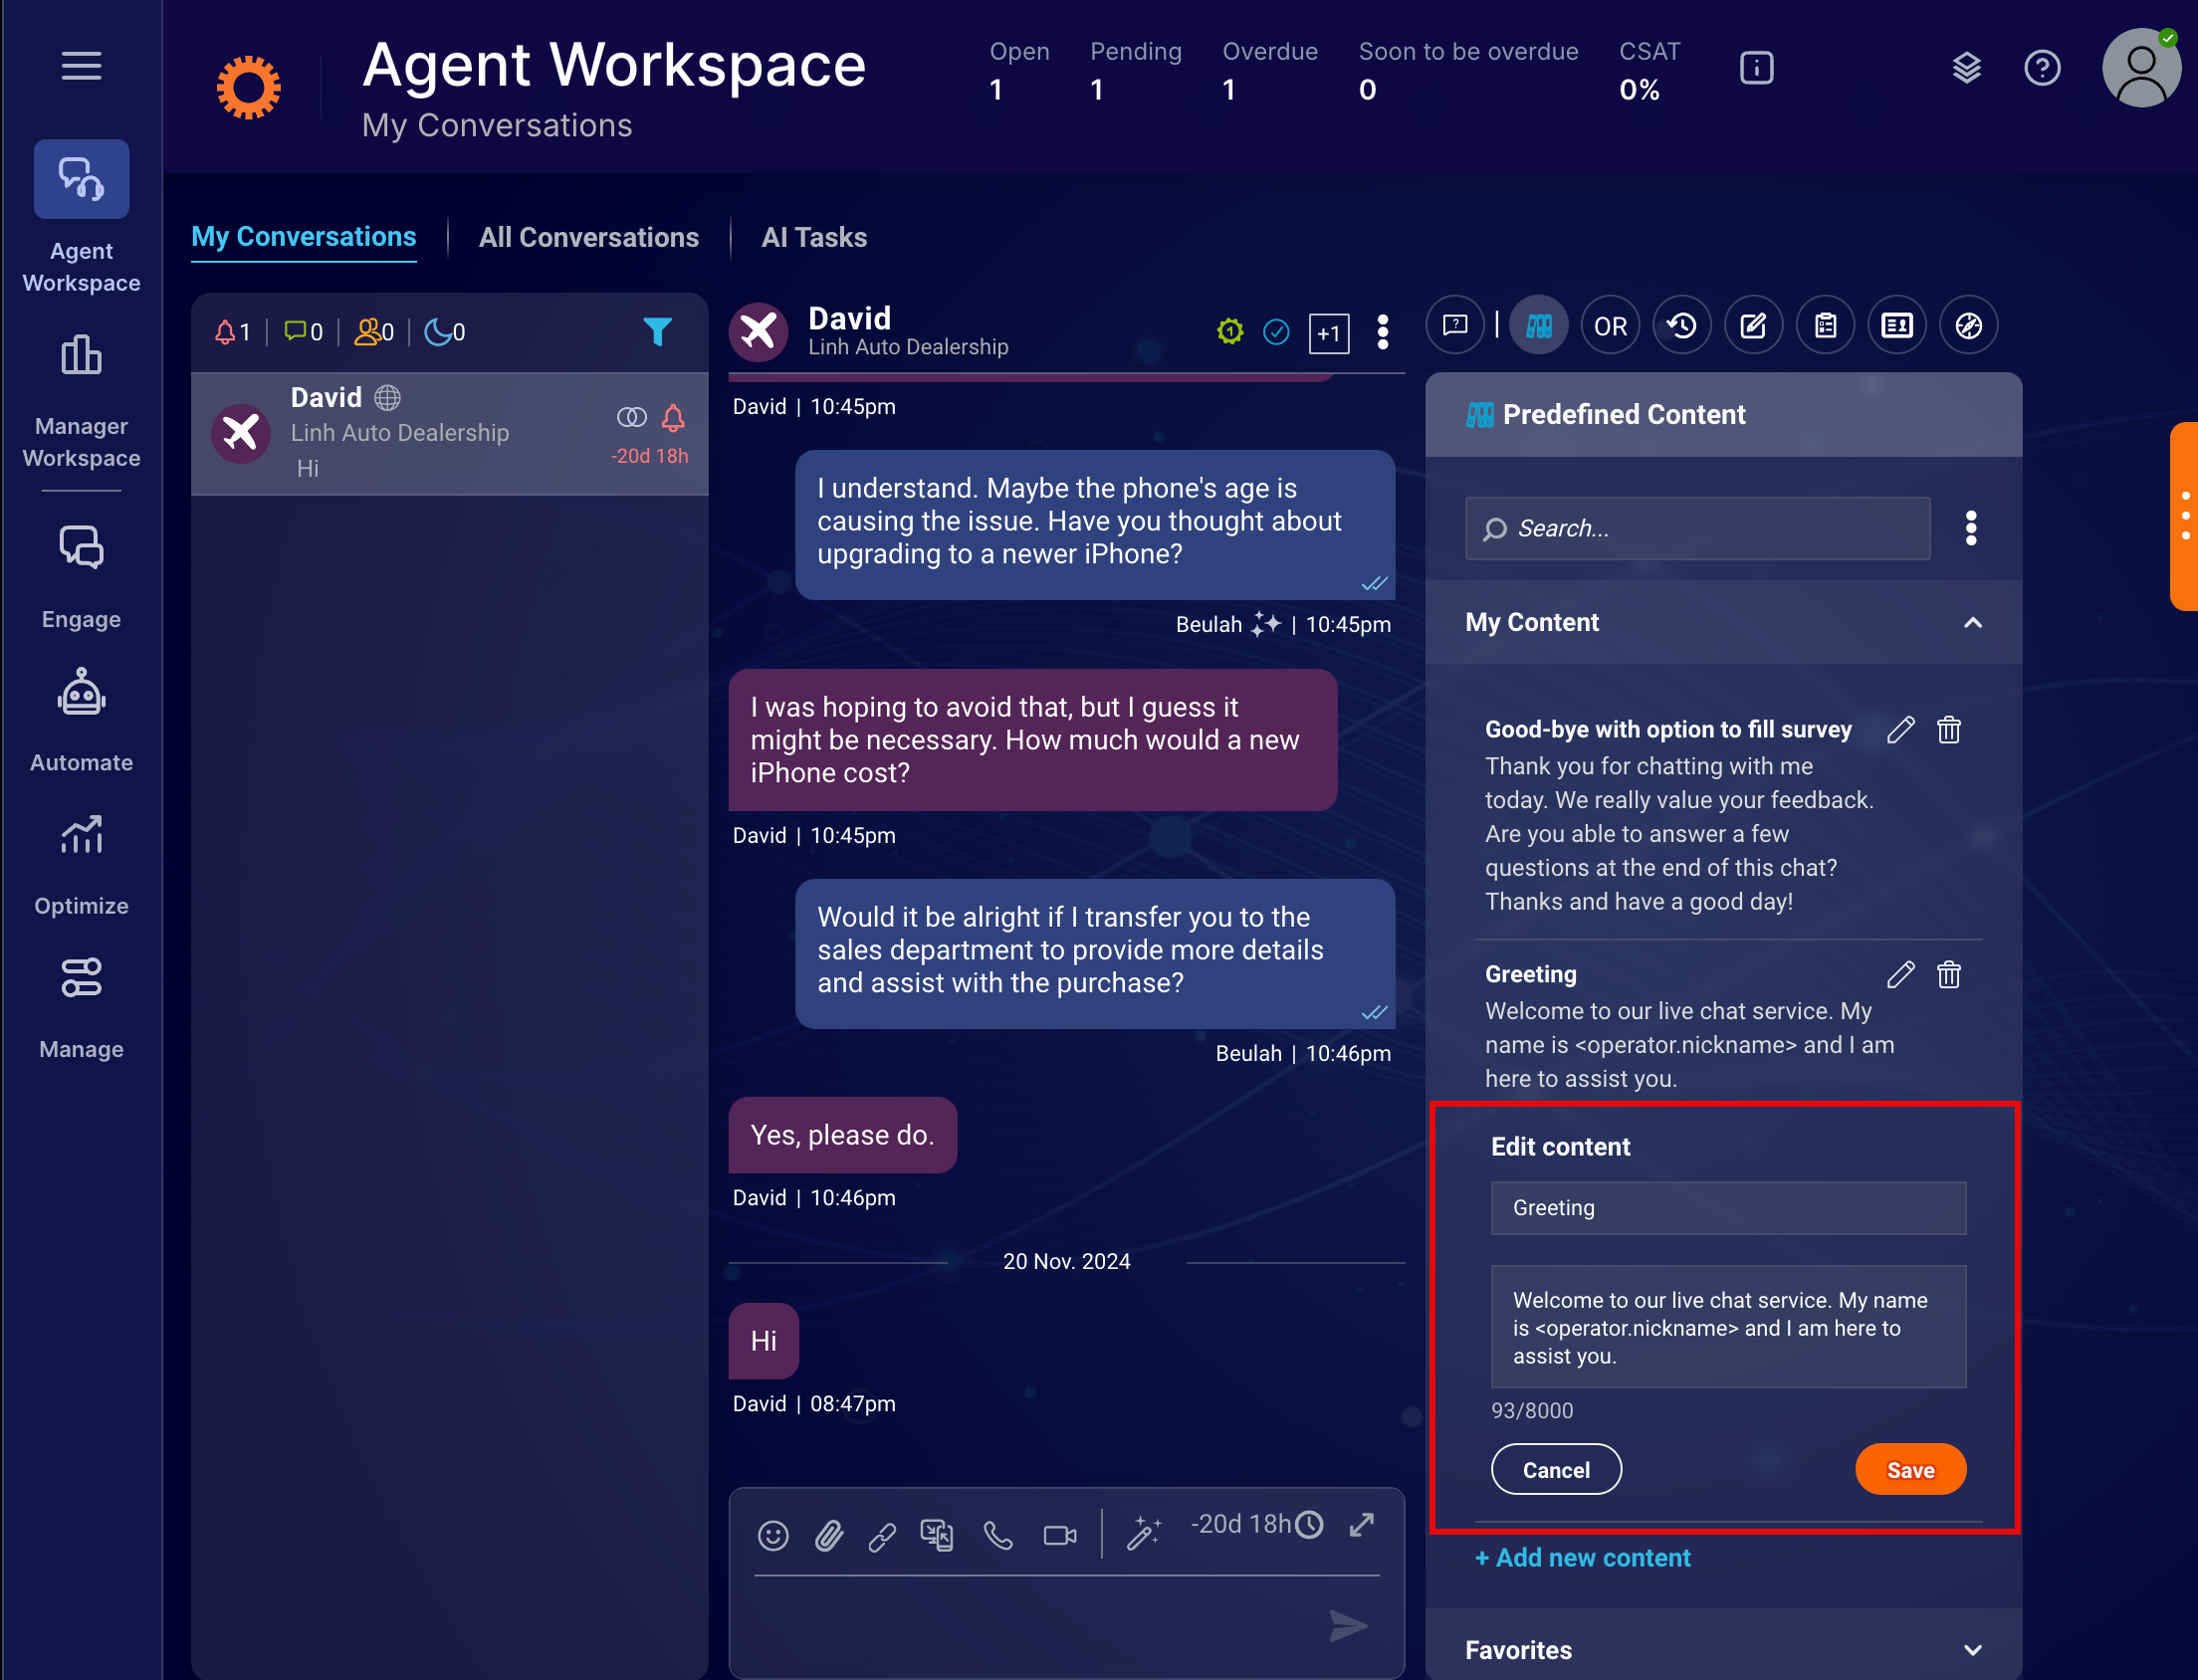
4. Modify the title and content details you want, then click Save. The predefined content is updated with the changes.
Deleting Existing Custom Predefined Content
1. At the top of the Agent Workspace page, click the Predefined Content icon. The Predefined Content section appears, displaying a list of predefined templates.
2. Click My Content to view the list of predefined templates.
3. Next to the desired predefined content, click the Delete icon. The Delete Custom Content dialog appears.
4. Click OK to confirm. The predefined content is removed from the list.
Marking Predefined Content As Favorite
1. At the top of the Agent Workspace page, click the Predefined Content icon. The Predefined Content section appears, displaying a list of predefined templates.
2. Click the desired section to view its list of predefined templates.
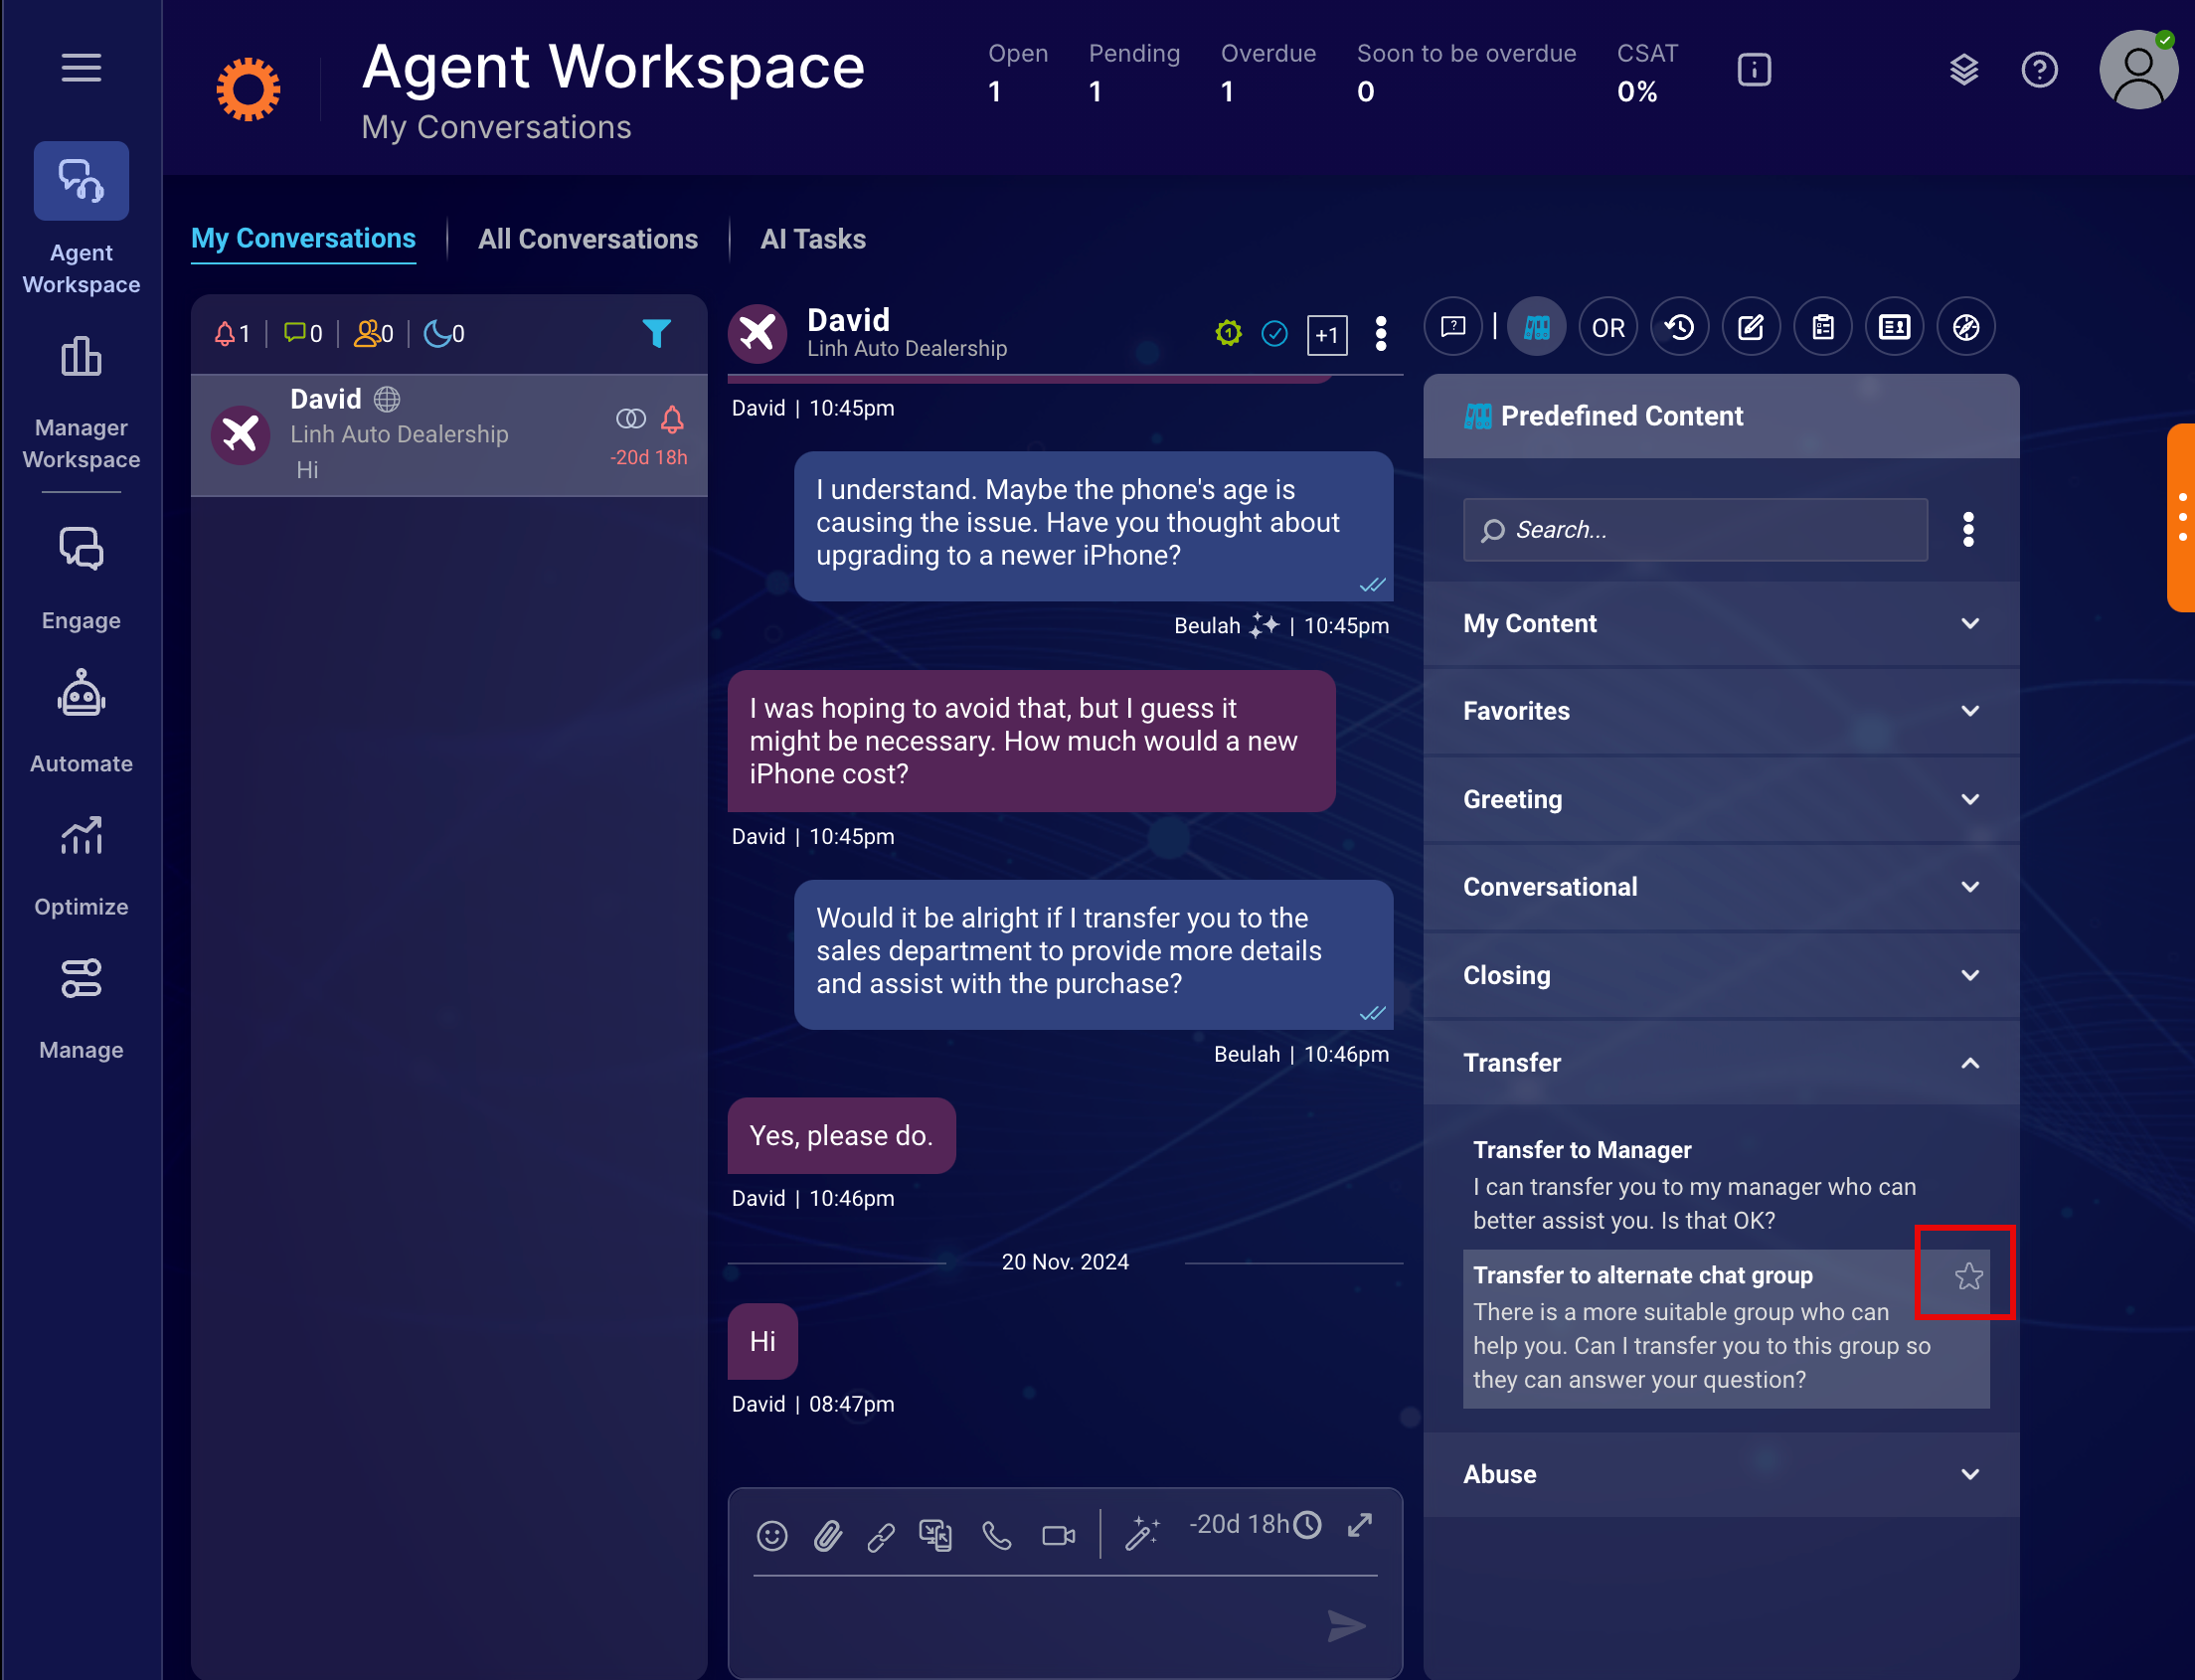
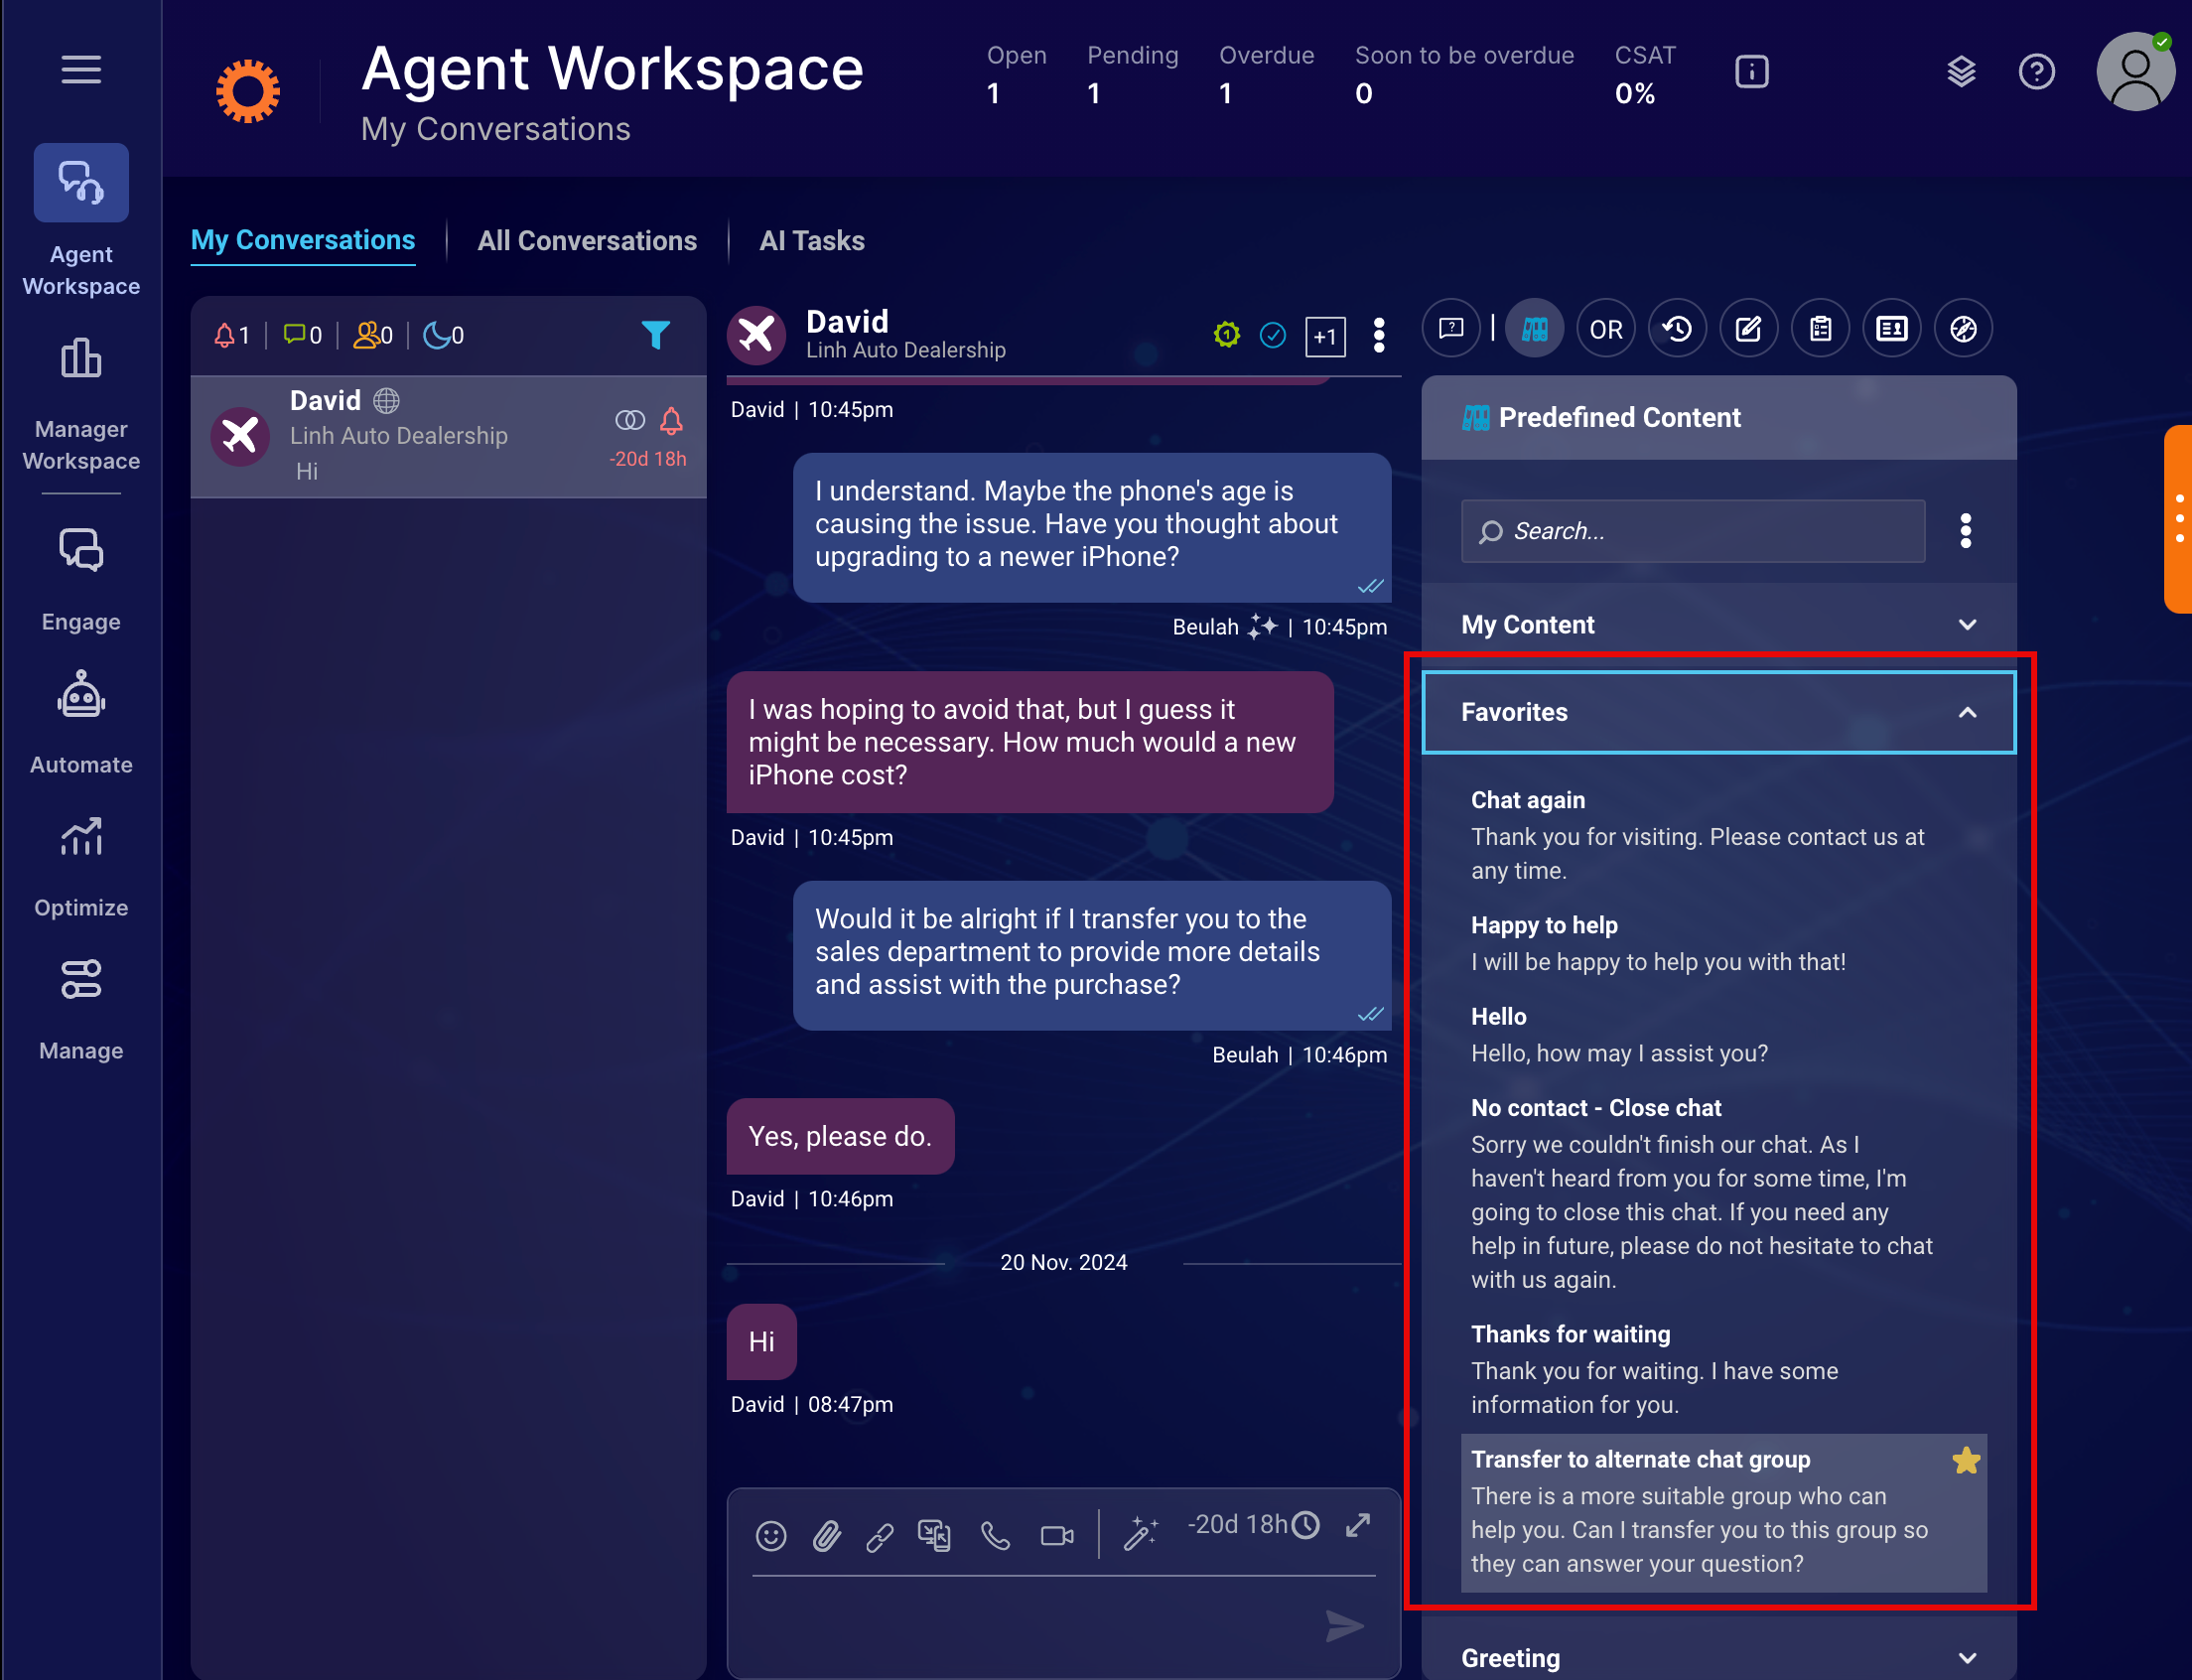
3. Next to the desired predefined content, click the Add to Favorites icon. All templates marked as favorites are displayed under the Favorites section.
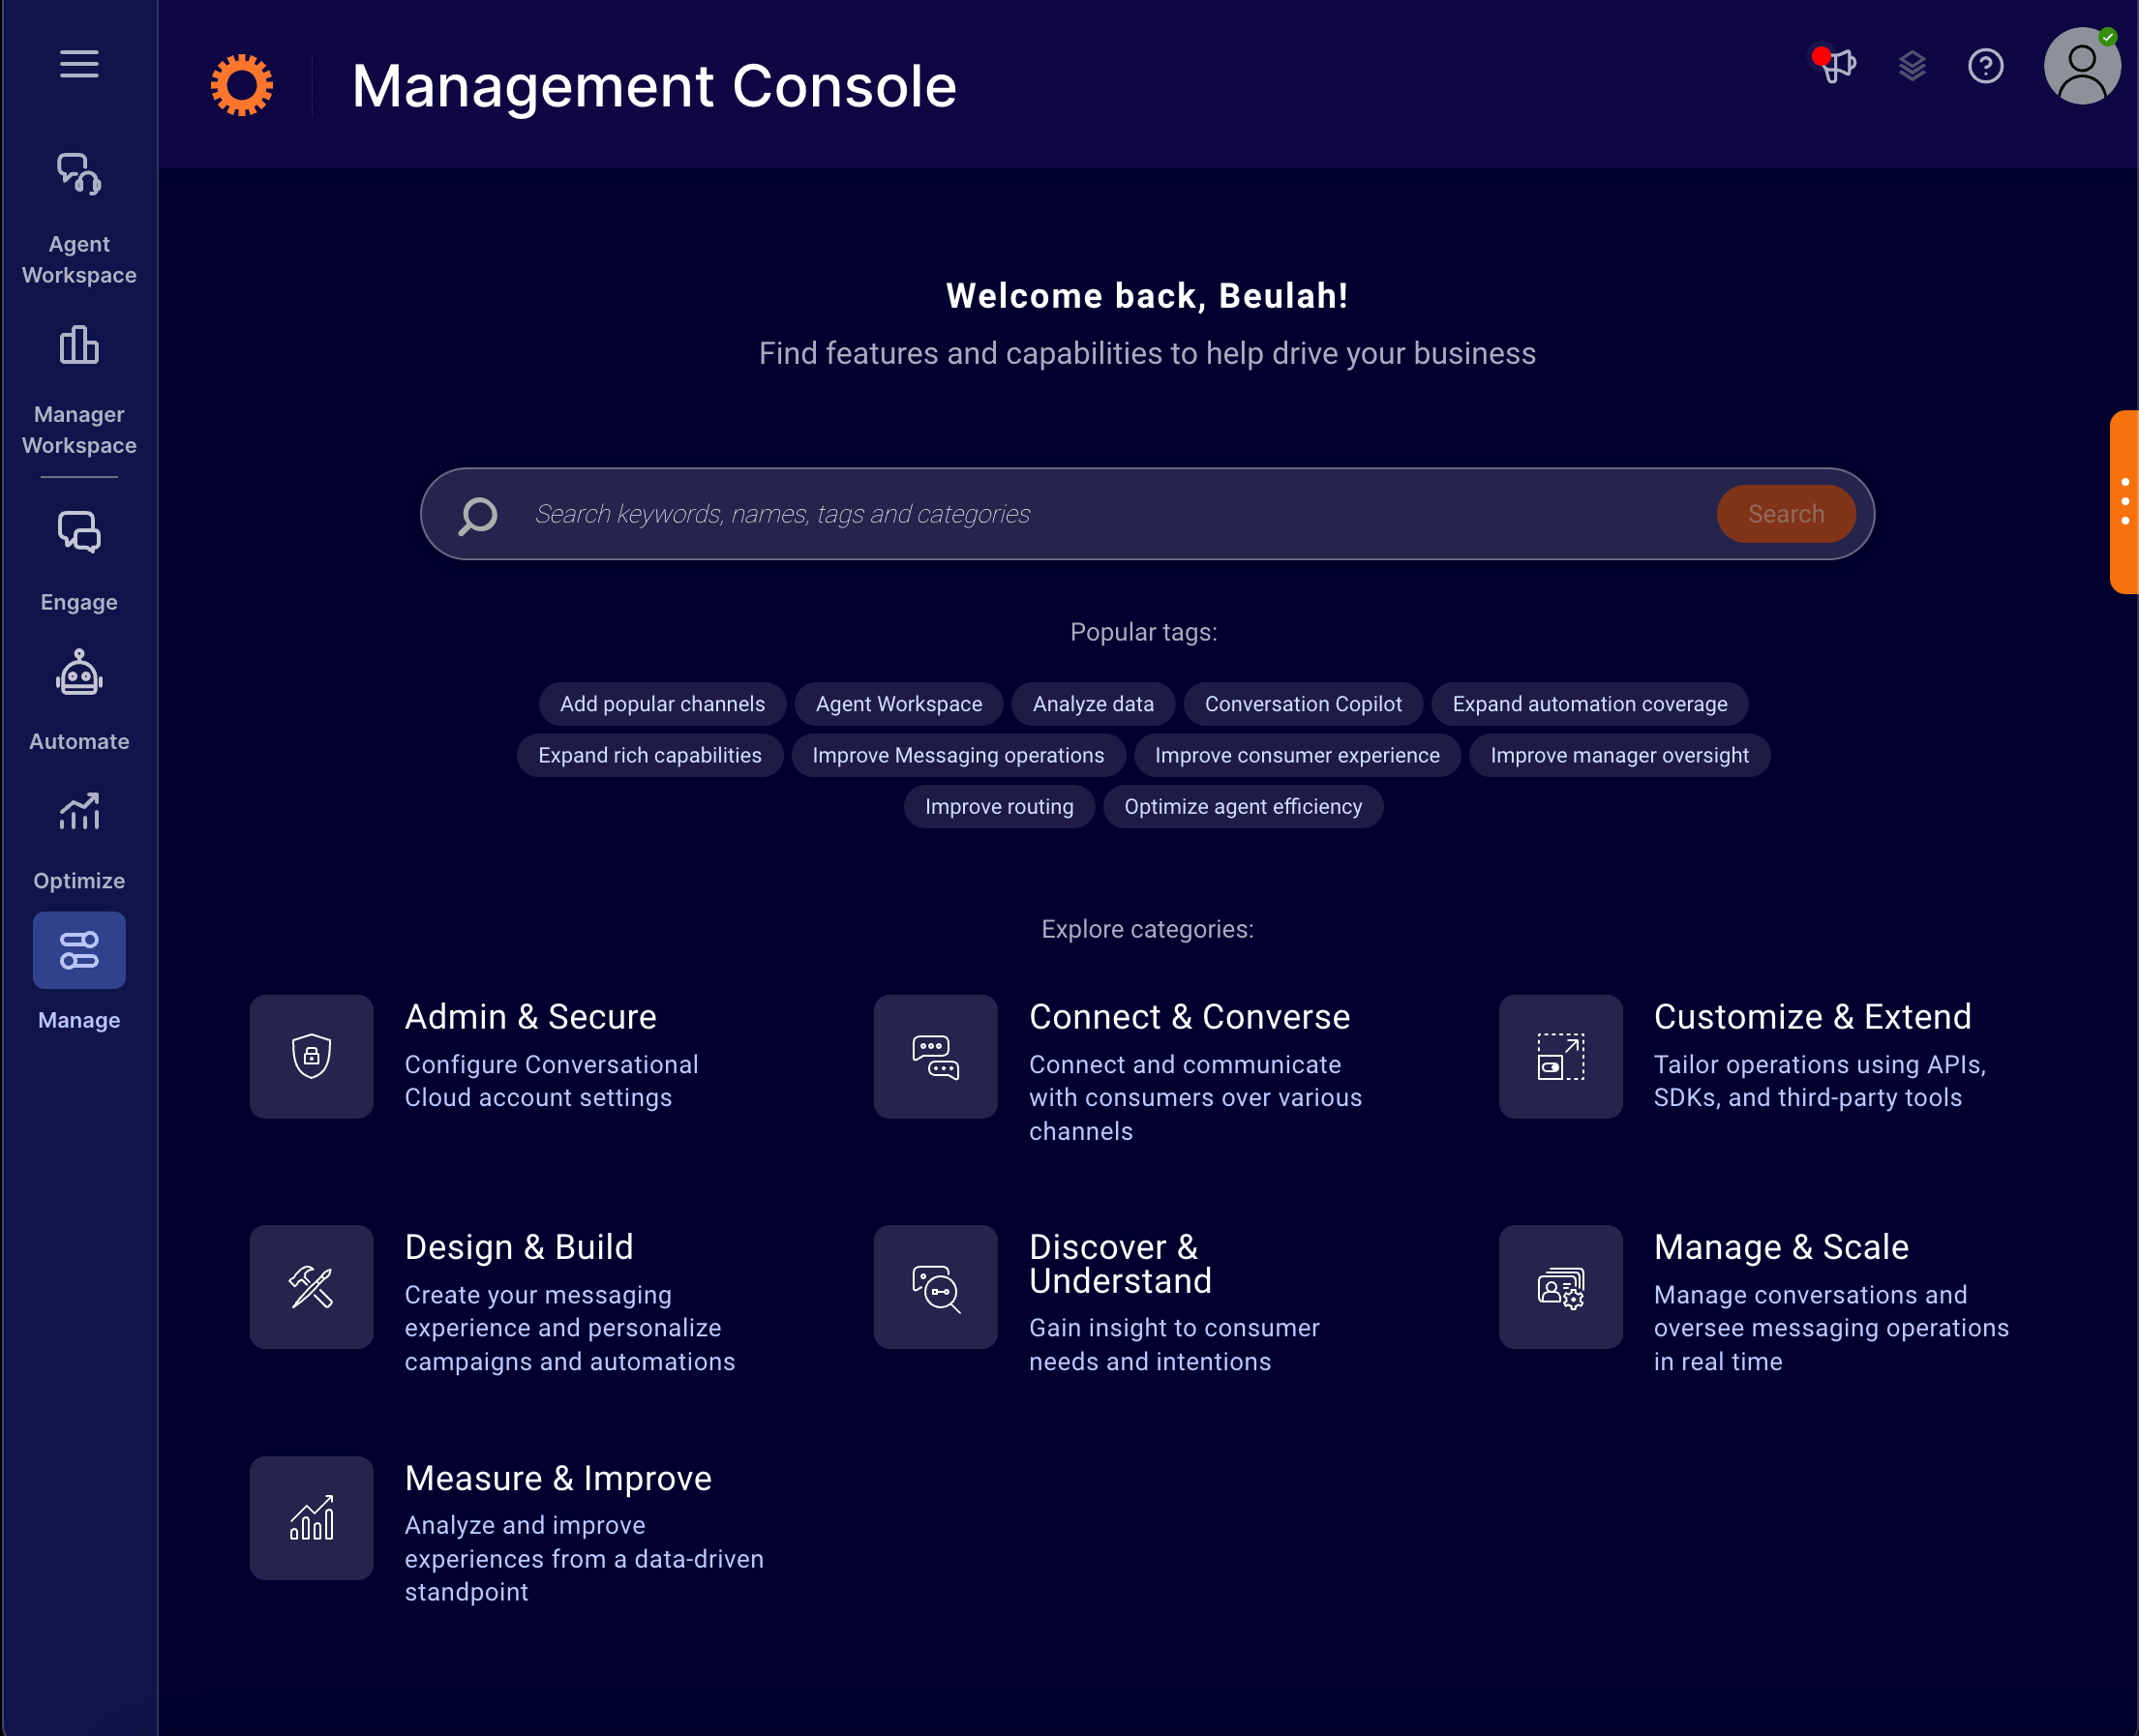
Configuring Predefined Content Settings
1. In the left menu, navigate to Manage > Management Console. The Management Console page appears.
2. Click Manage & Scale > Predefined Content. The Predefined Content configuration page appears.
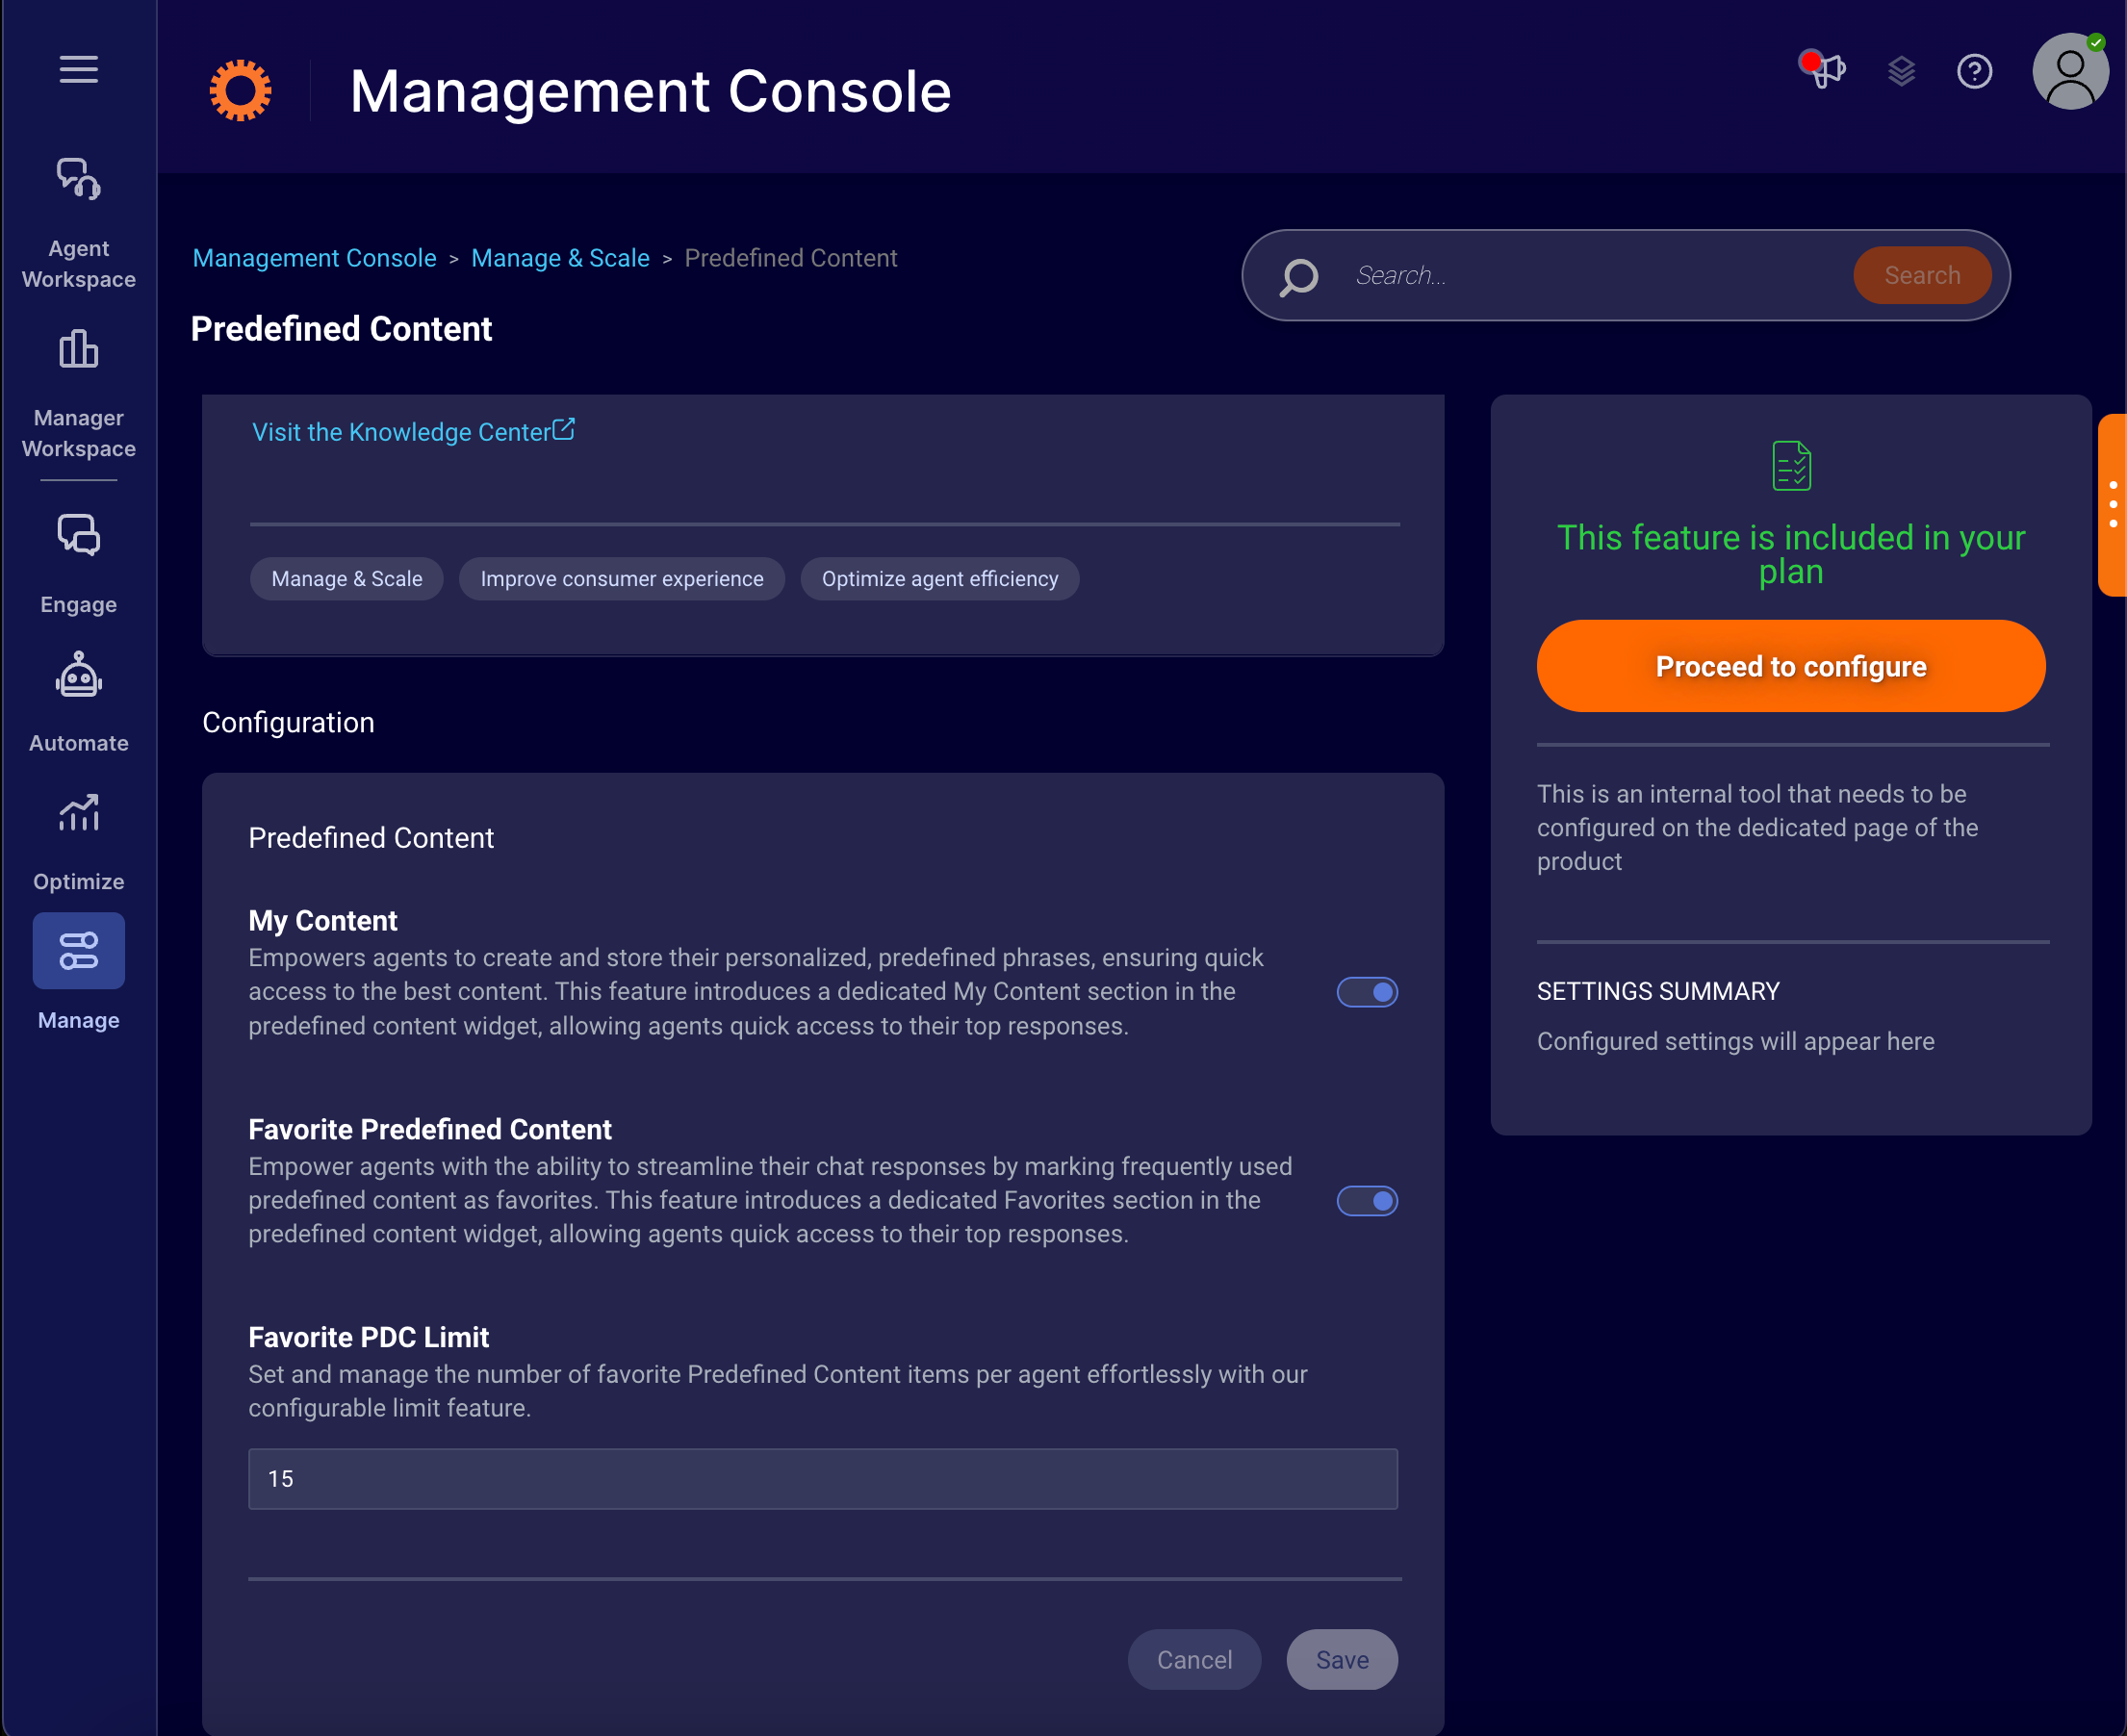
3. Toggle My Content and Favorite Predefined Content to enable the predefined content settings.
⚙️ When My Content is enabled, the section becomes available across the entire account.
4. To set and manage the number of favorite predefined content items per agent, enter a value in the Favorite PDC Limit field, then click Save.
➡️ The minimum number of favorite predefined content items per page can be 3 and maximum number can be 15.